· Hachipoo Apps · Productivity · 13 min read
How to choose a Mac shelf app in 2026 - and why Dockside feels different
Most Mac shelf apps are great at solving an immediate drag-and-drop problem. Dockside starts there too, but pushes further: it is designed to become part of your everyday workflow, with a deeper shelf, more customisation, and room to grow into an extra working surface on your Mac.
If you have ever dragged a file halfway across the screen, opened Finder just to hold something for a minute, or left a screenshot on the desktop because dealing with it properly felt like too much effort in the moment, then you already understand why shelf apps for Mac exist.
They solve a very real problem. You need a place to put something now, without breaking your flow.
That is why this category has become so useful, and why apps like Yoink and Dropover are already popular (my favourites too!) and well liked. They make that immediate drag-and-drop moment much easier especially with easy gestures, and for a lot of people that is exactly what a shelf app should do.
But after using shelf apps for a while, a pattern starts to show up. Most of them are excellent at solving the immediate problem, yet remain just that: temporary shelves. They are there for the moment you need them, then they fade back into the background. Useful, yes. Essential to your workflow? Not always.
Dockside starts from a different idea.
It can absolutely behave like a temporary shelf. You can drag files in, drag files out, and move on with your day. But the app is clearly built with a larger ambition: to become something you actually work from, not just something you briefly drop into.
That is why Dockside feels different.
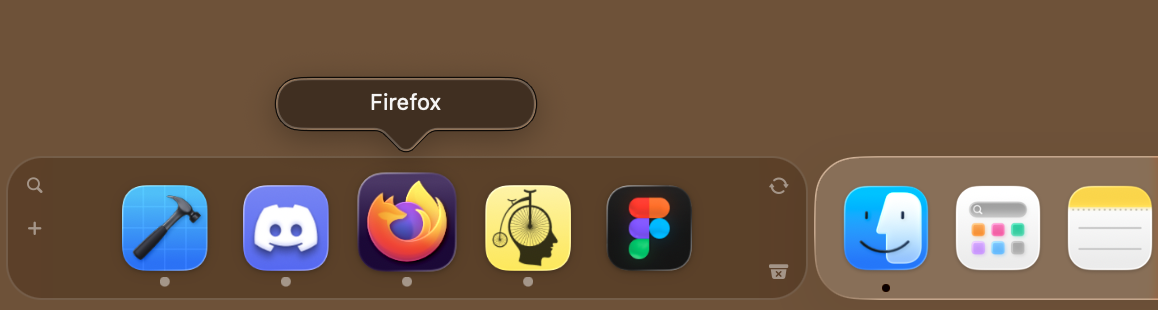
The default idea of putting it beside the Dock is not arbitrary. It comes from the same philosophy as the app itself: the Dock already occupies a part of the screen that feels structurally important, and there is often just enough adjacent space to make a shelf feel like it belongs there. Put simply, it is the most natural place for a shelf to become part of your workflow, because it lets the shelf feel less like another window and more like a companion to something you already use all day.
That design choice only works if the shelf stays clean and restrained. That is the hard part, and it is where Dockside succeeds (I think and I hope!). The goal is not merely to attach something to the Dock; it is to make it feel like Apple could have built a shelf app for macOS and this is what it might have felt like: native, calm, and visually at home.
One of the nicest validations of that idea is a user review featured on the site:
“The ghost of Steve Jobs approves of this.”
And the important part is that this Dock-first philosophy does not fall apart in real use. Dockside still works when the Dock is hidden, when full-screen apps take over, and even when the Dock is wide enough that there seems to be no obvious spare room. The app has its own expand behavior, paging, and Dock-aware handling, so the concept keeps working even when the simple marketing screenshot version of “shelf beside the Dock” is no longer the whole story.
That difference matters more than it may sound on paper. A shelf that becomes part of your desktop rhythm is a very different thing from a shelf that only appears for a single drag-and-drop errand.
Most shelf apps stop at “hold this for a second”
That is not a criticism. In many cases, that is exactly what people want. You drag a file. You need somewhere to park it. You keep moving.
For that kind of use, a floating shelf is perfectly reasonable. It appears, helps, disappears. Problem solved – Dockside can do that too.
But there is also a ceiling to that model.
Once you start wanting more than a temporary holding area, the limitations become obvious. The shelf may feel intrusive because it needs to float over the workspace. It may not stay organized once you are handling more than a few items. It may help with today’s drag, but not become a better place to manage the recurring patterns of your work later in the week or next month.
Dockside is much more interesting when you think about it from that angle. It is not trying to be a clever place to drop something for five seconds. It is trying to be a shelf that can stay useful after the immediate task is done.
That is the thread running through the whole app.
If you want the raw, exhaustive version of that idea, the best place to start is the full feature list. This post is the guided version.
The core difference: Dockside can become a working surface
The main Files shelf (the left or the top shelf) is where that shift becomes obvious.
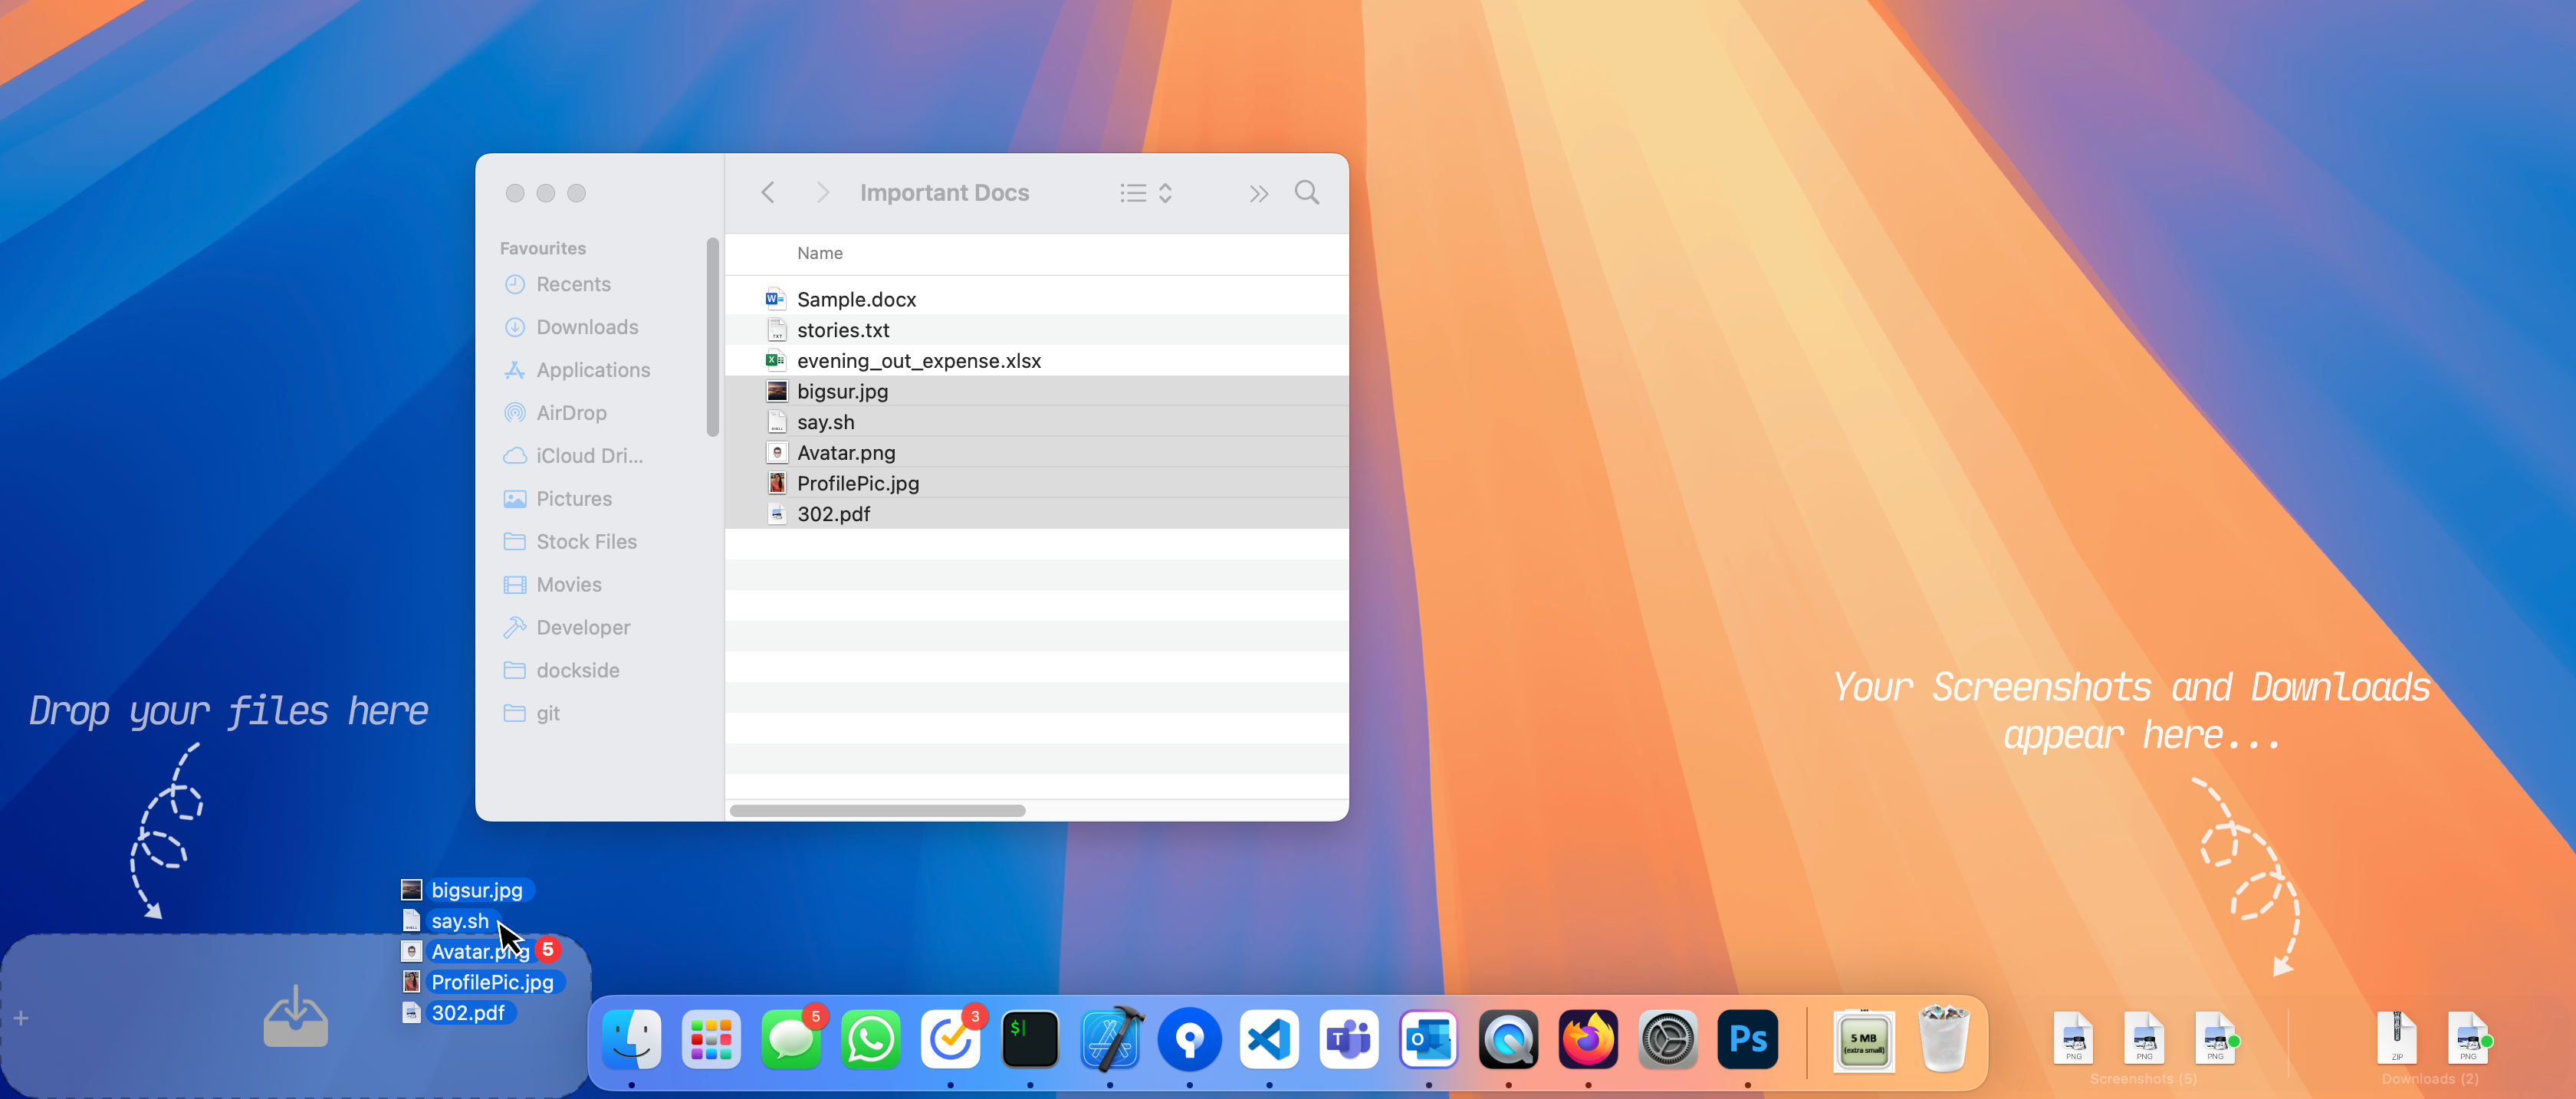
At the simplest level, it behaves exactly how you would expect from a good shelf app: drag in files, folders, links, text, screenshots, apps, or notes; keep them nearby; drag them back out to Finder, another app, or a folder. That foundation is documented in Main Shelf: Files Shelf.
But Dockside does not stop there.
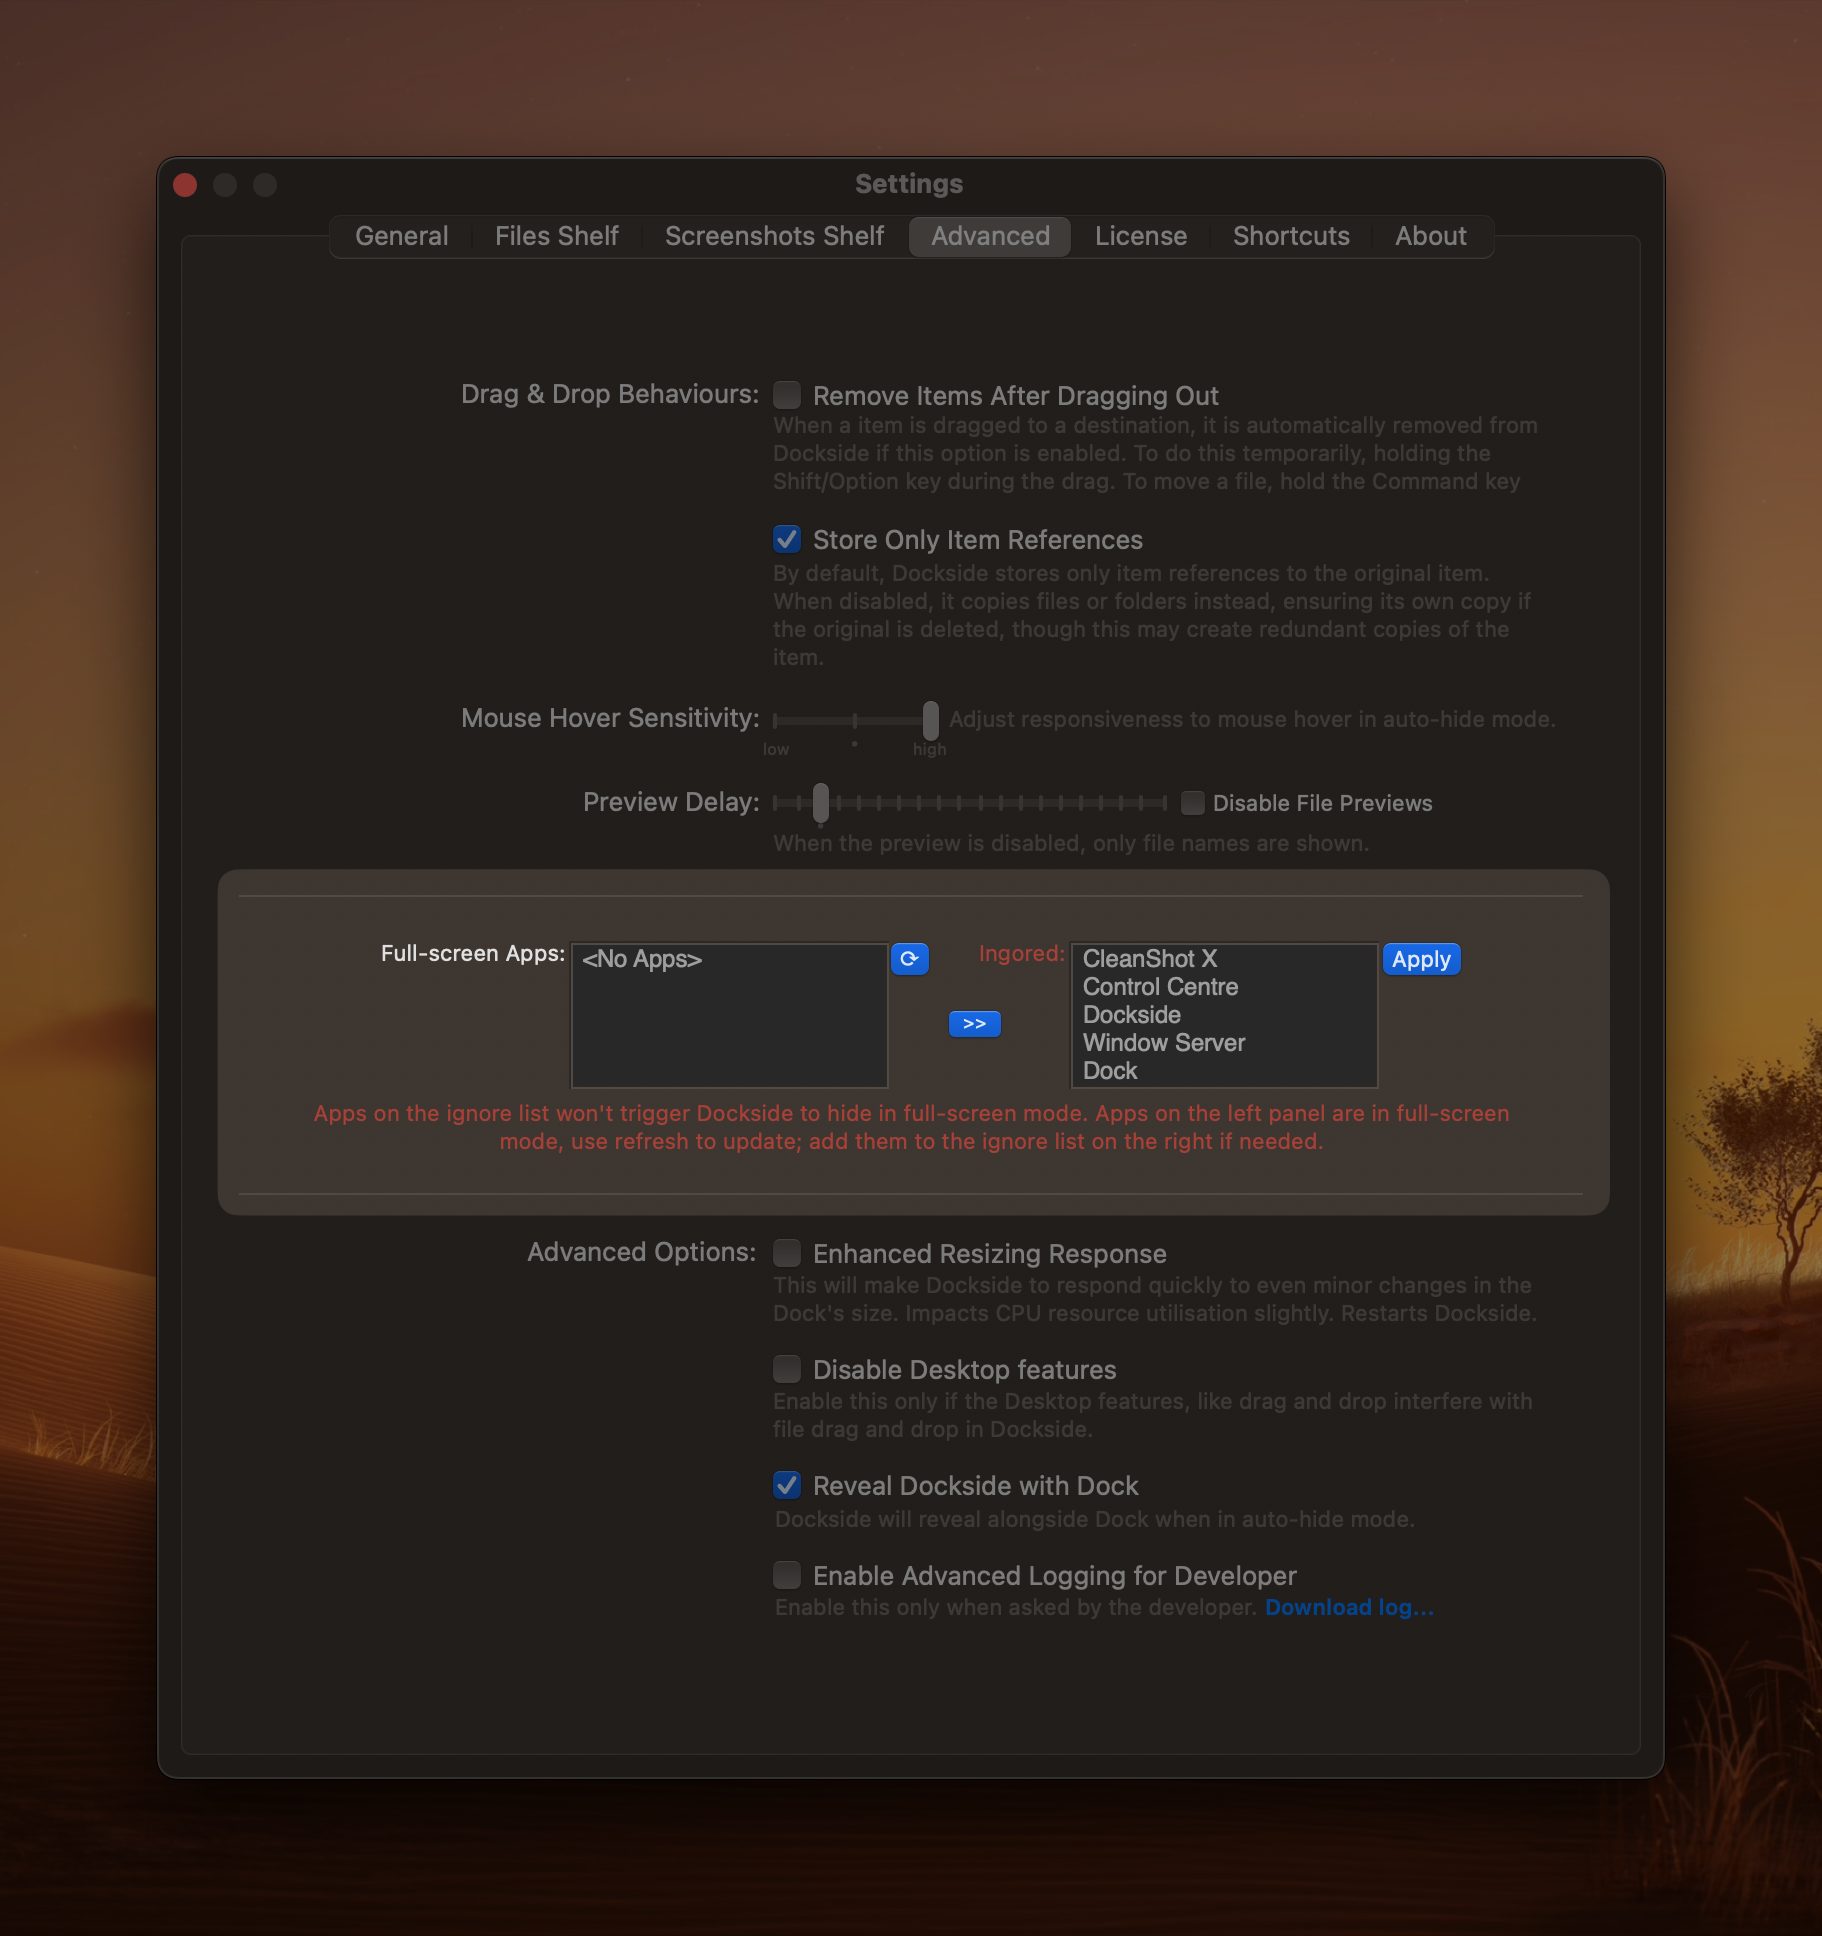
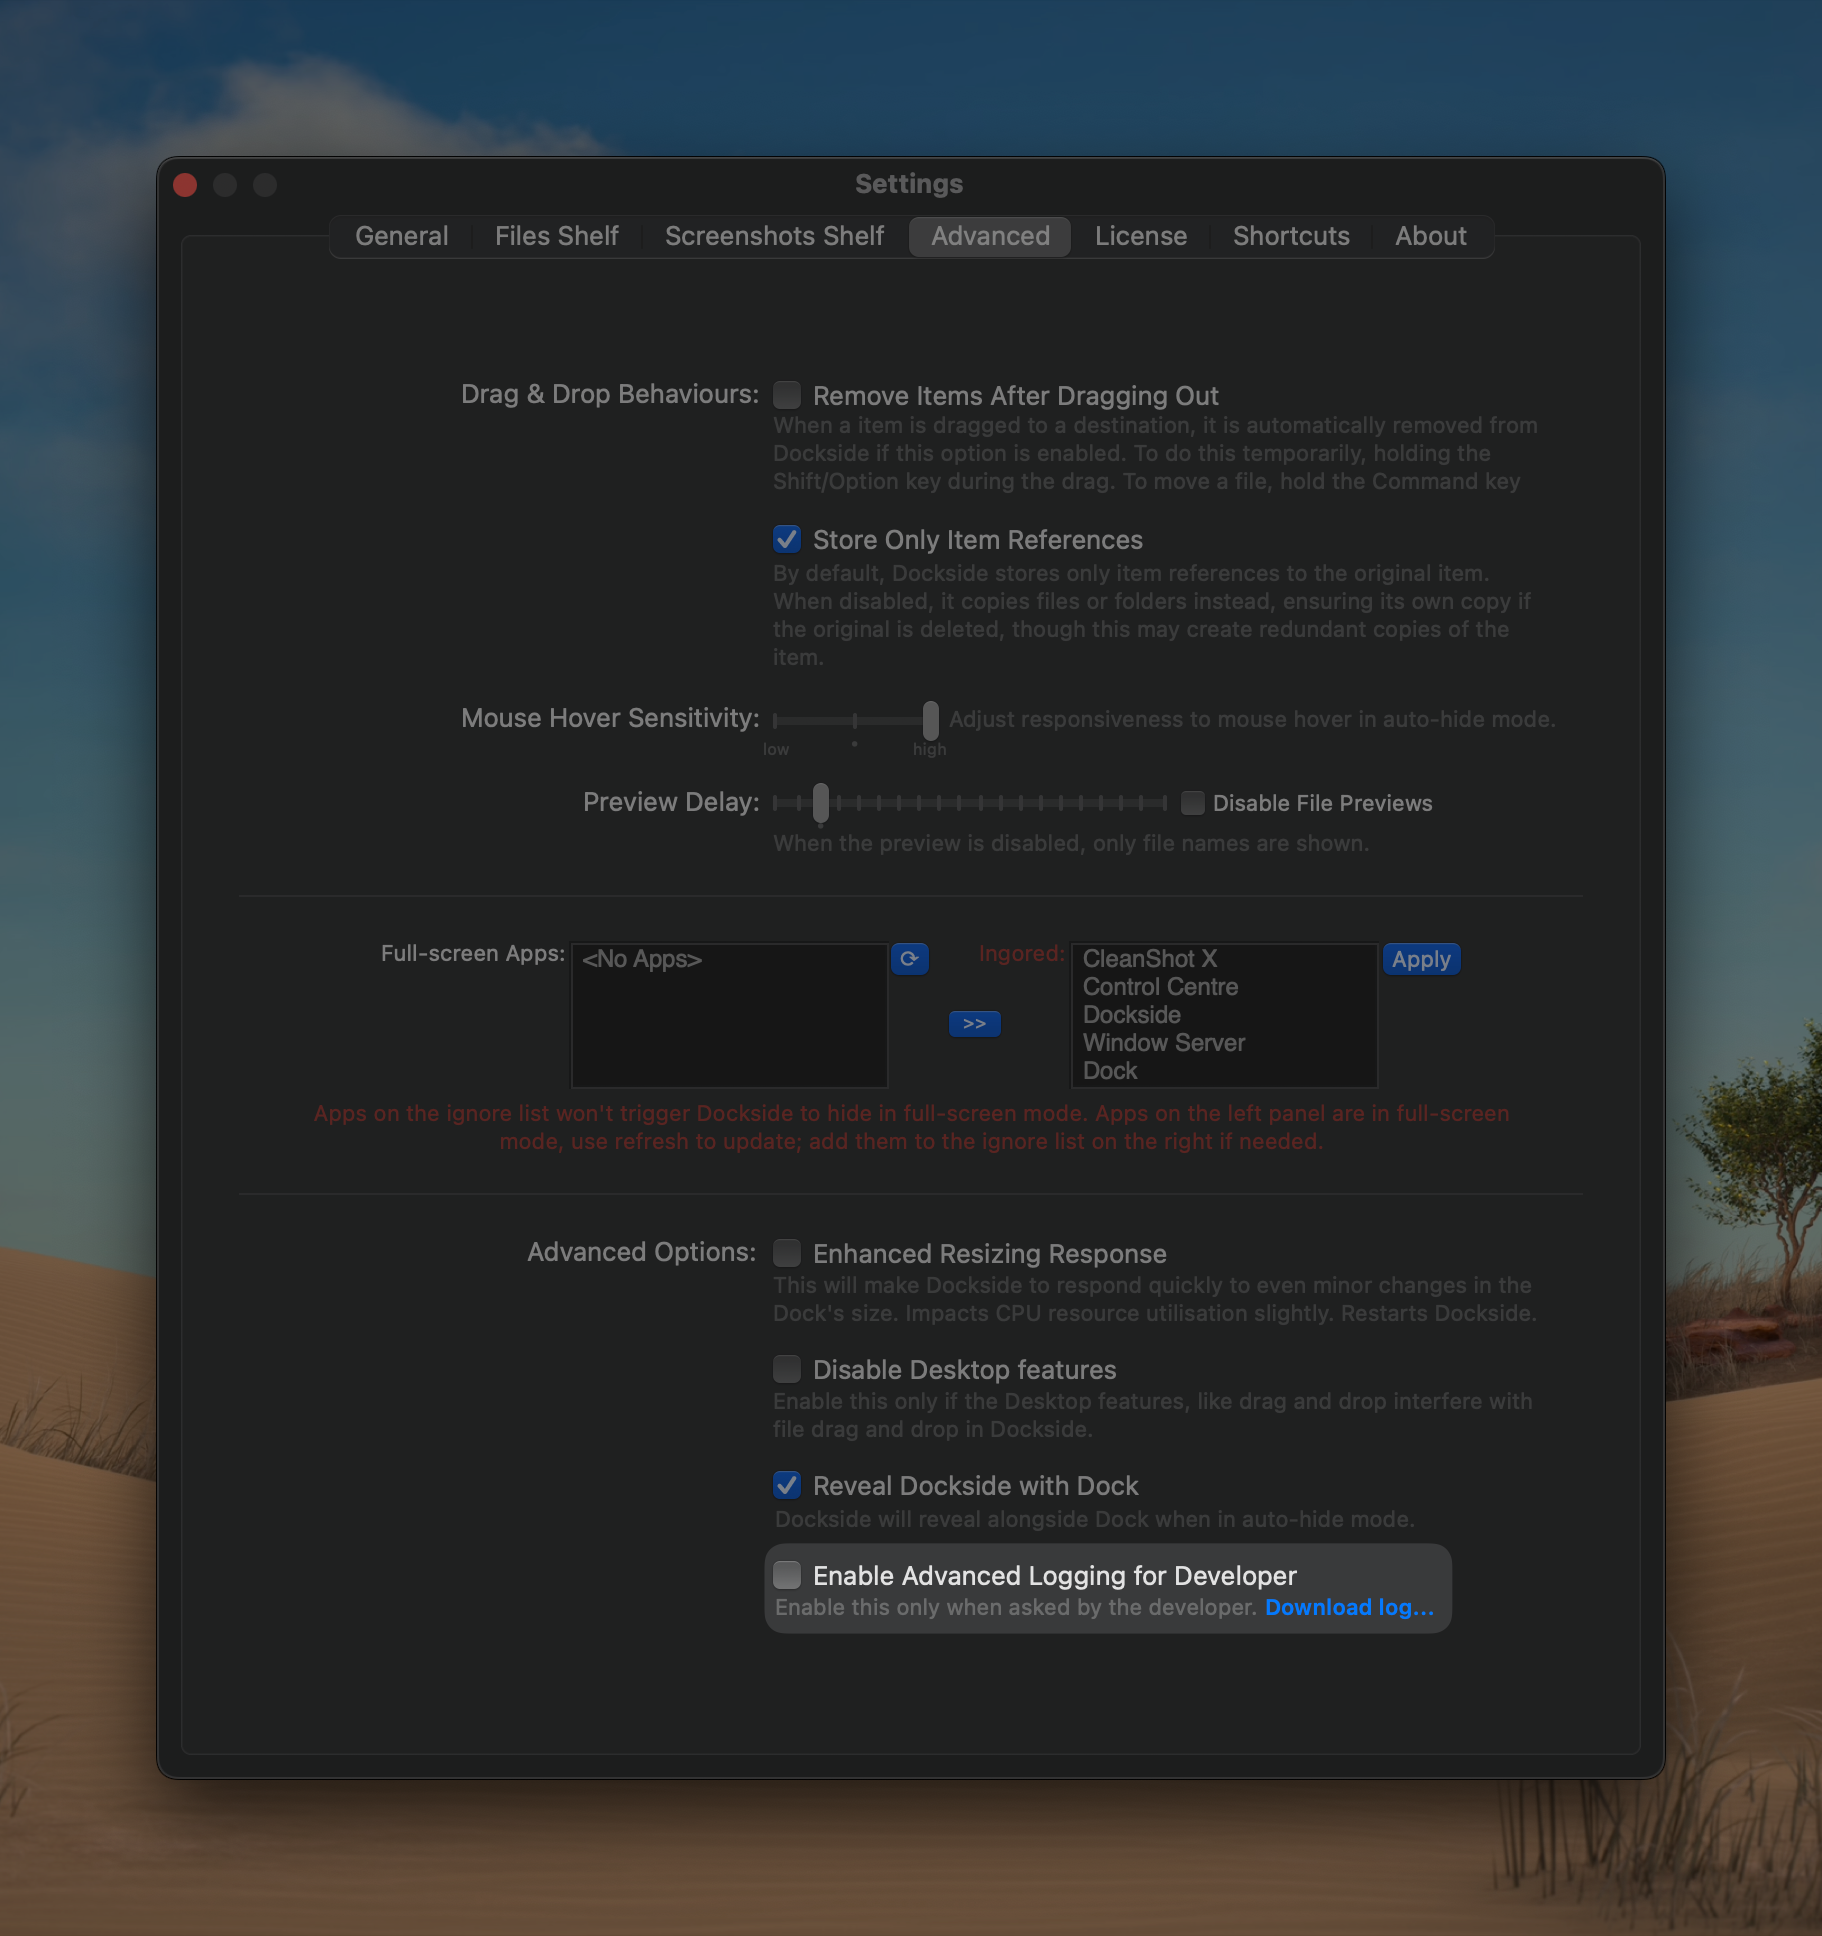
You can search on the shelf. You can expand and flip through pages of items when more files exist than can fit in one strip. You can choose whether the shelf stores a reference to the original file or a real copy. You can keep it visible while it still has items. It can hide with the Dock, reveal with the Dock, and stay workable even when the Dock itself is not in the simple always-visible state people usually imagine. Even that set of decisions tells you this is not being treated as a throwaway tray.
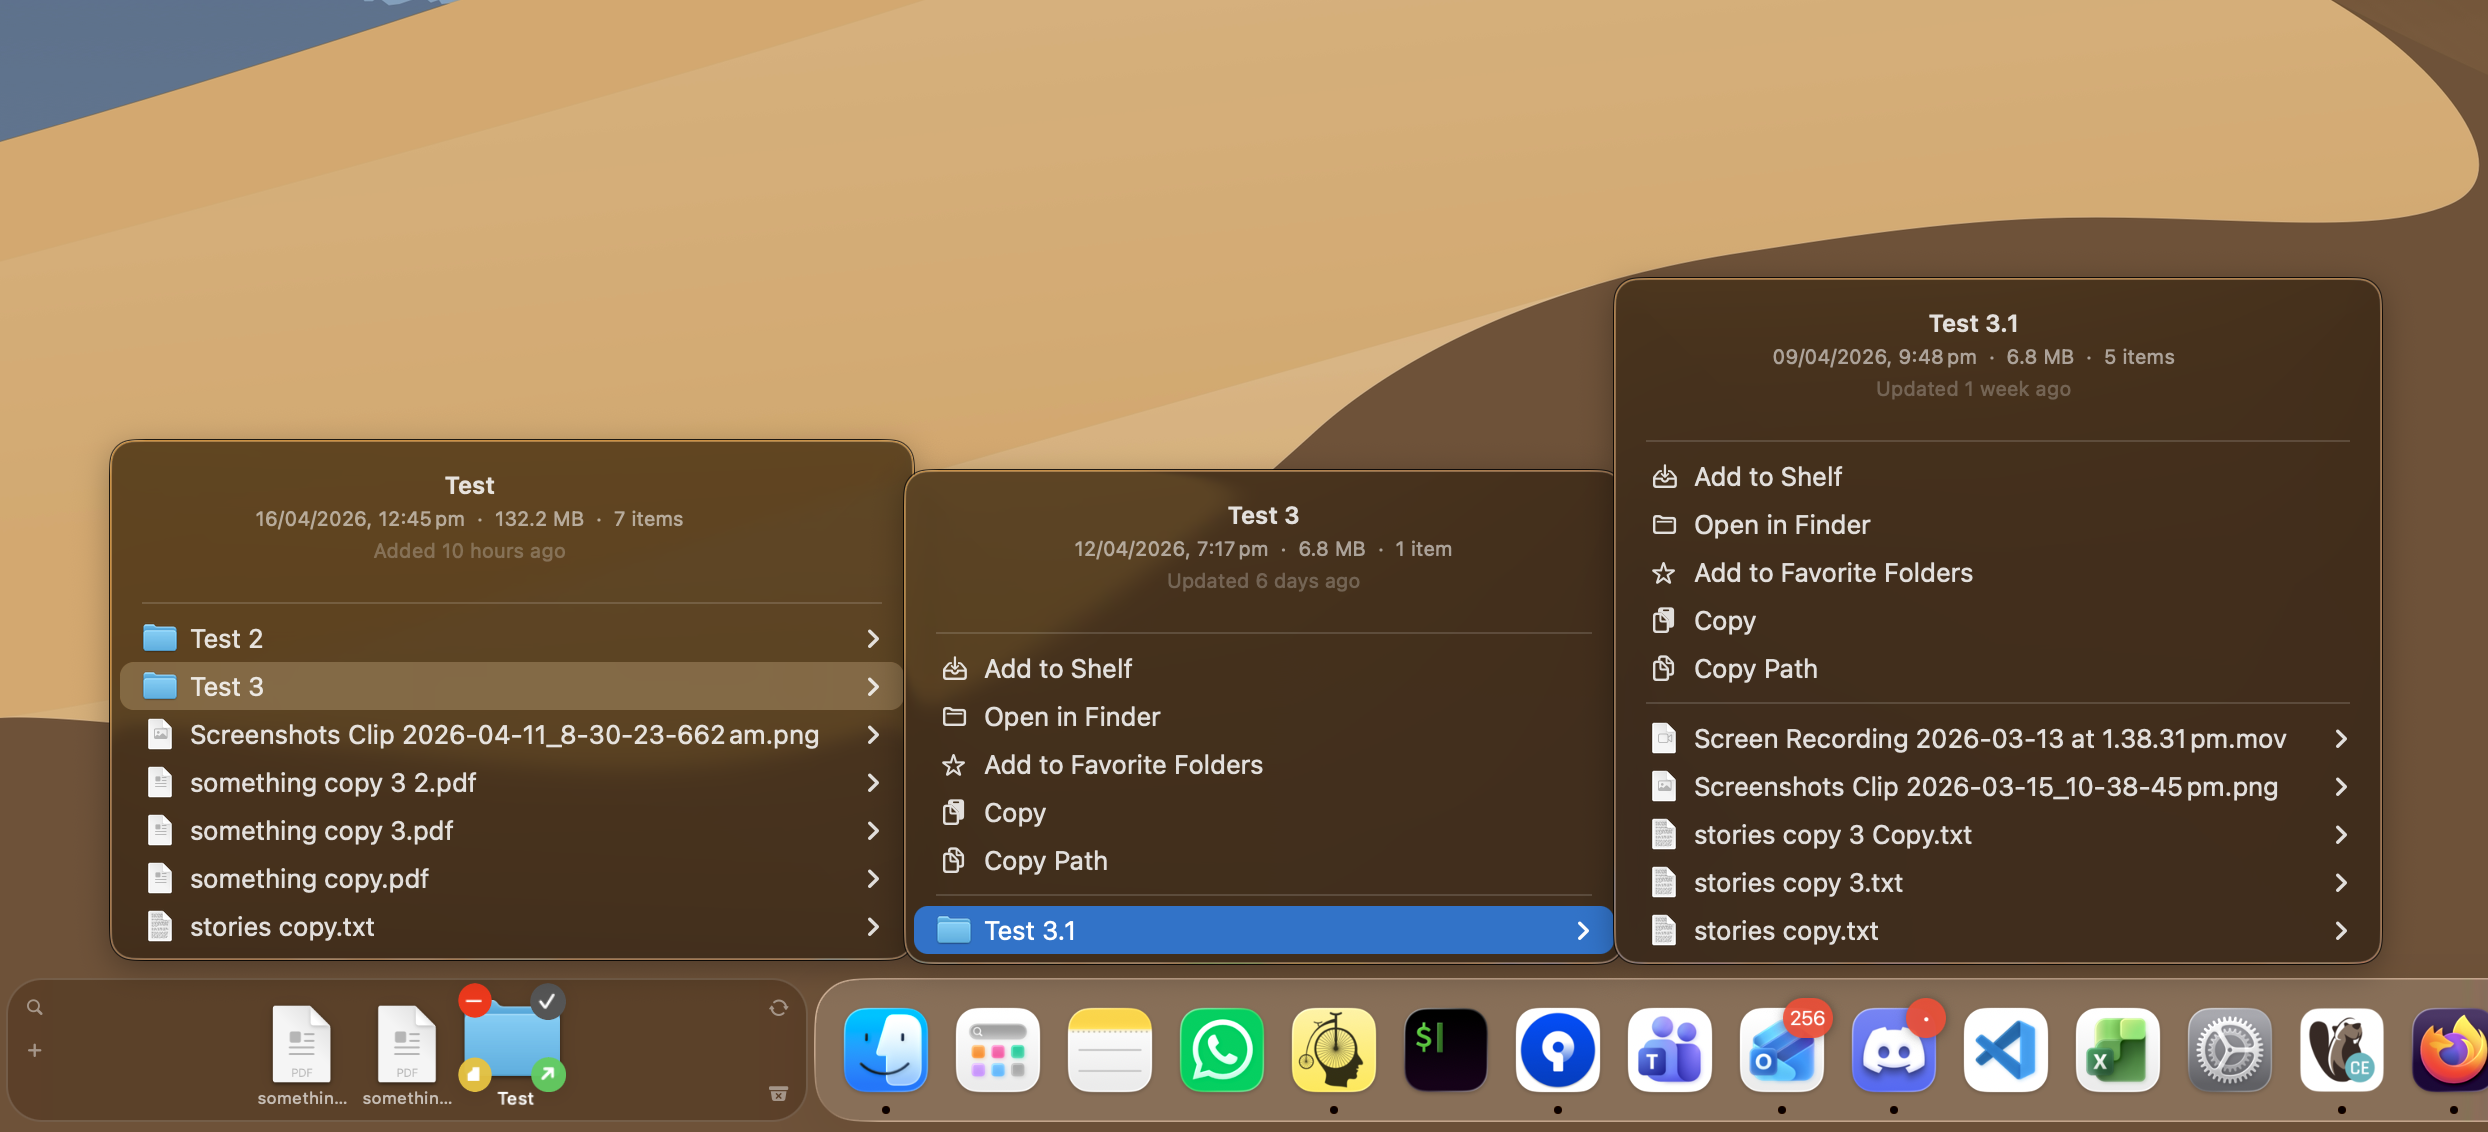
Then the Files shelf goes further.
You can split it into multiple areas, give each area its own icon and name, filter by color tags, and add folder watch rules with exclusions and subfolder control. You can create notes directly on the shelf and assign your favourite app to work with it. You can build stacks, break them apart or create a new folder from it, restore things from history, and move items between areas. You can even drag apps into Dockside and let them live in the App Drawer, which makes the shelf start to feel a little like an extra Dock next to your Dock. This is just some of the utilities, there’s much more…
Doesn’t stop there, if your workflow revolves around folders, you can add them to the shelf and manage it right from within the shelf.
You can even make Dockside an extra Dock by the Dock! Why not.
That is where Dockside earns the claim that it is one of the most customisable file shelf apps on macOS, period. It is not just customisable in color or placement. It is customisable in behavior, structure, and purpose.
Let’s talk about the other shelf…
The second shelf is better understood as a configurable companion surface. By default it is configured to show your recent screenshots and downloads in a split area. But it can also be set up for Recents, clipboard history (yes, Dockside has this), monitor any of your favourite folders, media controls, or live system stats. Depending on how you work, that shelf can become a quick access strip, a passive monitor, or a place where frequently changing files keep bubbling to the surface without cluttering the main Files shelf.
That separation is genuinely useful. It means Dockside does not dump every category of item into a single shared pile. Your active files can stay in one place, while your fast-moving streams of recent content can live in another.
This is one reason the app feels cohesive in use. It treats different kinds of shelf behavior as different jobs instead of forcing them into one universal bucket.
For that side of the product, see Second Shelf: Screenshots and Downloads Shelf and the more visual Dockside Usage Tips.
The shelf is deeper than it first appears
Another reason Dockside feels less temporary is that you can stay inside it longer without immediately falling back to Finder.
You can preview files with Quick Look and hover previews. You can navigate through folders and subfolders from within the shelf. You can drop files into shelf folders and nested subfolders. You can create folders from selections. You can reveal files, copy paths, and use Finder-style actions without feeling like you have stepped into a totally different environment.
That matters because a truly useful shelf is not just a place where files wait. It is a place where files remain actionable.
This is also where paging matters. Dockside does not pretend that everything worth keeping will always fit in one neat strip. The shelf can expand and move through pages of items, which makes it practical to keep working even when your current context is larger than a handful of files.
And because the shelf can hold files, folders, apps, notes, links, clipboard items, recents, watched-folder content, and more, the result is a much more flexible tool than the phrase “shelf app” initially suggests.
Drop zones are where Dockside stops being just a shelf
If the Files shelf is what makes Dockside feel deeper, drop zones are what make it feel like part of a real workflow.
Most shelf apps help you hold something until you decide what to do with it. Dockside can help you decide in advance.
You can configure separate zones with their own icon, label, accepted file types, primary action, destination, and what should happen afterward. A zone can run a Shortcut, trigger AppleScript, call a shell script, run a CLI command, copy to a folder, move to a folder, email a file, or fire one of Dockside’s built-in utilities.


That is a big shift.
Now the shelf is not only a place to pause. It can also become the place where work branches into your next step.
That is what makes Dockside feel capable of becoming part of a workflow instead of merely helping around its edges.
If that is your kind of feature, read Drop Zones: Workflow Automation and Integrations next.
Customisation is not decoration here
Some apps say they are customisable when they really mean you can change the tint or move a few controls around.
Dockside is customisable at a much more practical level.
You can change where it lives, how it reacts to a drag, whether it stores references or copies, how long it stays visible, whether it follows the Dock, whether it hides with the Dock, how many items it keeps, how different areas behave, what the second shelf shows, how clipboard capture works, how folder monitoring behaves, and how automation zones react to different file types.

That is a very different sort of customisation. It is the kind that changes whether the app feels generic or personal.
It is also why Dockside can borrow the familiar flavors of common shelf apps while still feeling like more than a clone of any one of them. If you want a very light, temporary shelf behavior, you can get close to that. If you want something more structured and more persistent, Dockside has room for that too.
So who is Dockside really for?
Dockside makes the most sense for Mac users who have already discovered that a shelf is useful, but have also started wishing that the shelf could do more than just hold something for a minute.
It is for people who:
- want shelf behavior without the constant feeling of a floating layer getting in the way,
- move a lot of files, folders, links, and temporary items through the day,
- want to see frequently accessed items in the one place–folders, recents, screenshots, downloads, clipboard history etc.
- like the idea of turning the shelf into an extra working surface, not just a drop target,
- and want a Mac utility that is flexible enough to adapt as their workflow gets more specific.
That does not mean every other shelf app is doing it wrong. It just means Dockside is aiming at a broader destination.
It wants to be the shelf you keep using after the “I need somewhere to drop this” moment is over.
If you want to try Dockside that way, there’s a 14-day trial, go try it yourself here Dockside for Mac and the authoritative breakdown is on All features.
What’s on the roadmap for Dockside?
Nearly two years after launch and 100+ releases later, Dockside is still evolving quickly, with many of its best new features and improvements shaped by feedback from Reddit and the wider Dockside user community. There is much more to come.
But broadly, there are two key features coming soon:
- A companion iOS app to share/a across devices from your shelf.
- Ability to create more Dockside shelves and place them anywhere on your screen.
Join the community
If you want to share feedback, ask questions, or see what other Dockside users are up to, join the community on Discord and Reddit.
FAQ
Is Dockside only useful if I want a shelf beside the Dock?
No. That is one of its standout strengths, but not the only way to use it. Dockside can also be placed elsewhere on screen. The bigger point is that it gives you a shelf that does not have to feel like a floating interruption.
Is Dockside trying to replace apps like Yoink or Dropover?
Not in the sense that those apps are invalid. They are good at what they do. Dockside just aims at a broader outcome: not only solving the immediate drag-and-drop moment, but becoming a shelf you can actually build part of your workflow around.
Where should I go if I want the full list, not the narrative version?
Use the full feature list. This post is the argument. The feature page is the complete spec.
What should I read after this?
Go to Dockside for Mac for the product overview, Dockside Usage Tips for a more visual walk-through, and Integrations if automation is the part that matters most to you.
Disclosure: Hachipoo Apps publishes this site and builds Dockside app. This article is intentionally opinionated, but every major point here is grounded in the current product and the linked feature documentation.