· Userguides · 12 min read
Usage Tips for Dockside App
Overview
Dockside is a versatile file shelf app designed to streamline your workflow on macOS. This guide will walk you through its key features, tips for effective usage, and advanced options that enhance your productivity.
File Dockside vs. Screenshots & Downloads Dockside
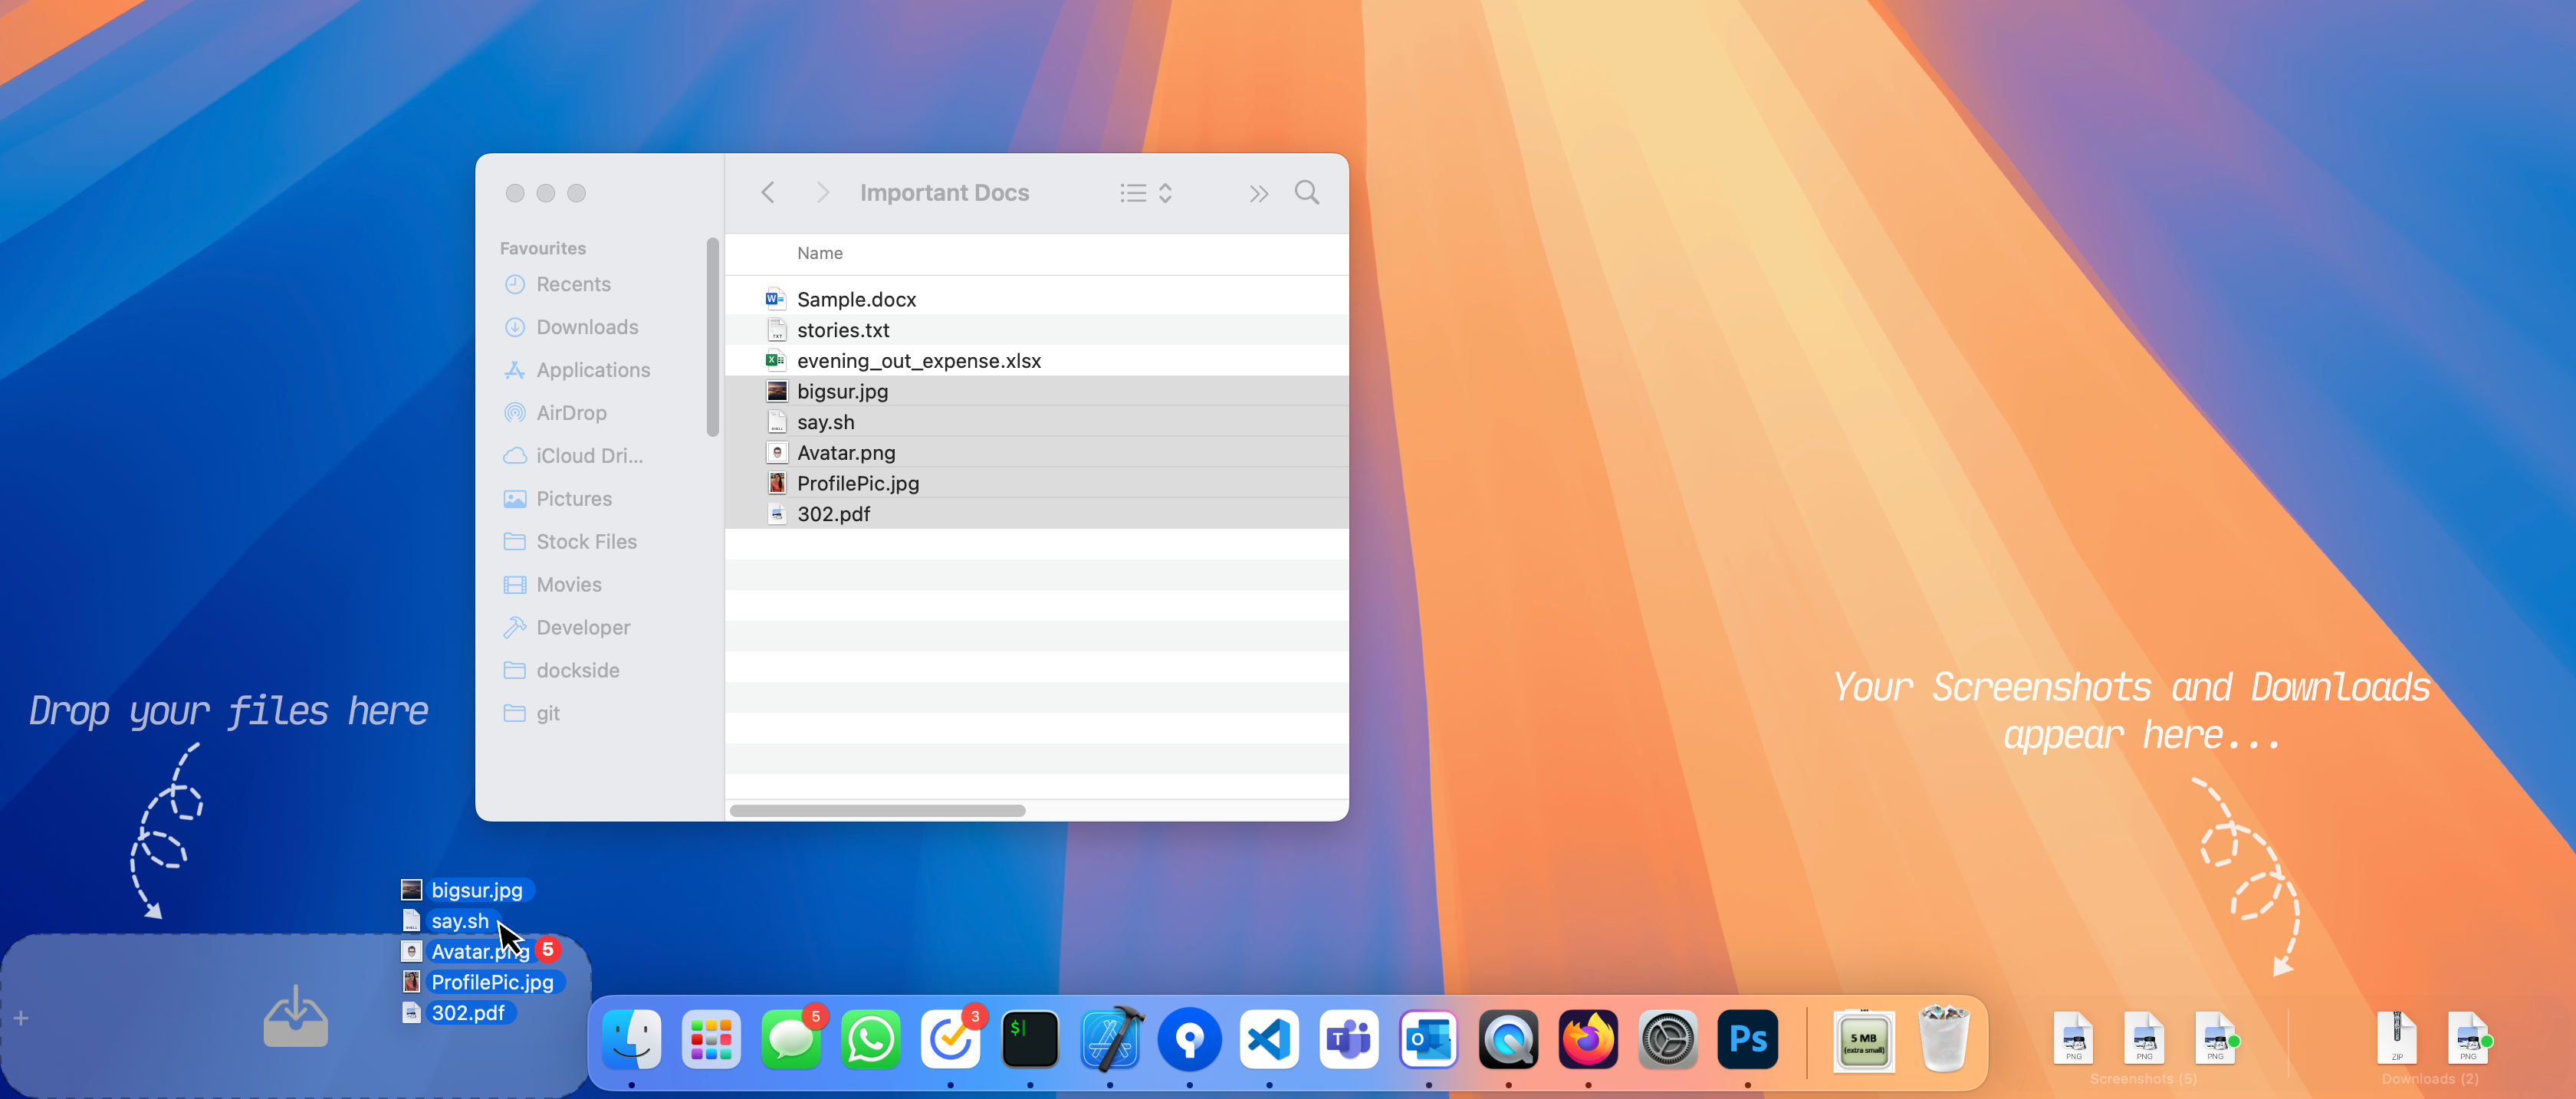
Dockside consists of two areas:
- File Dockside (Left Side): This shelf sits on the left side of the macOS Dock and it is where you can drag and drop items such as files, folders, pdfs, images, videos, apps and even text snippets from your local machine or from other external sources like web.

- Screenshots and Downloads Dockside (Right Side): This shelf sits on the right side of the Dock and it automatically monitors and displays your recent screenshots and downloads, providing easy access to them. You cannot drag and drop items into this side—it serves purely as an access point. You can also configure Dockside to additionally monitor the Clipboard for the Screenshots to download them for you for later use.
 Easily configure this shelf to monitor your favourite folder shelf or the “Recents” shelf using Settings, giving you instant access to what you need based on your needs, right inside of the Dockside.
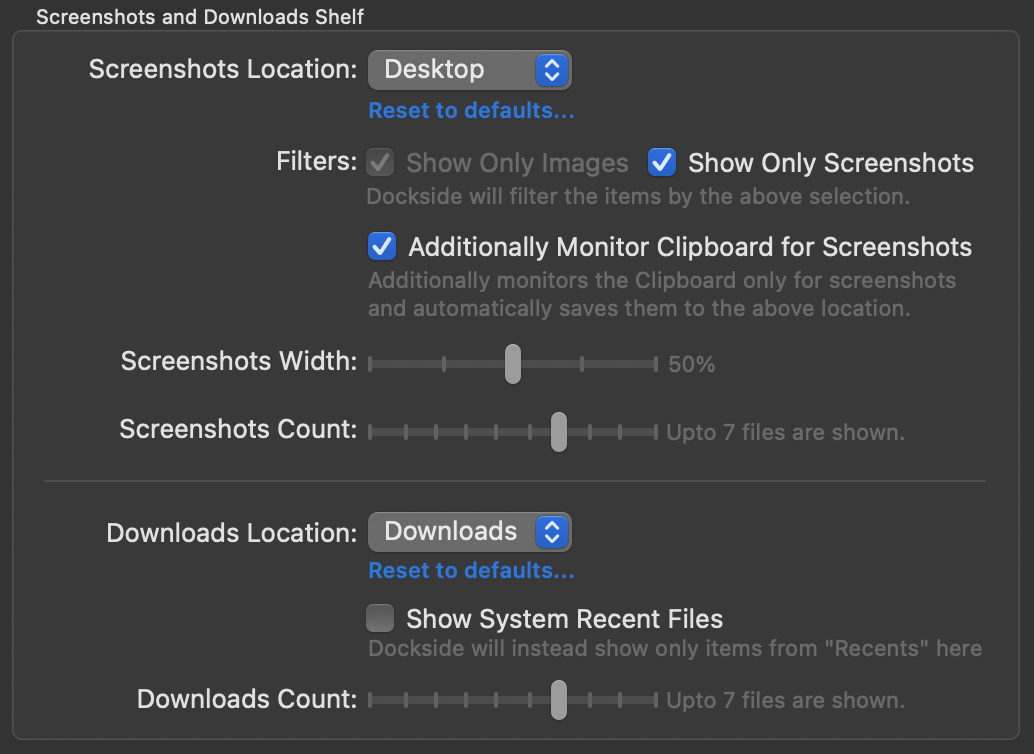
Visual Cues & Behavior
Dockside provides helpful visual cues and responsive behavior to enhance your experience:
Bounce Effect on Drop: When dropping items into Dockside, the icons bounce to give you a visual cue of where the files are placed. This makes it easy to visually track and locate items you’ve just added.
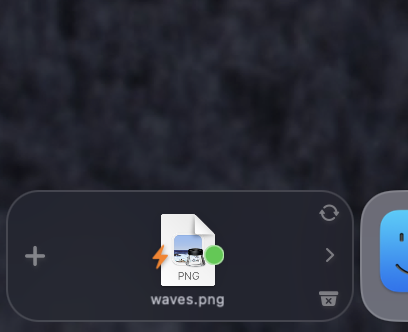
Green Dot Indicator 🟢: Items recently added to Dockside—such as dropped files, new screenshots, or newly downloaded items—are marked with a green dot. This makes it easy to spot recent changes for quick access or drag-out operations later.
Image/Video/PDF optimisation ⚡️: Images/Videos/PDFs that are optimised (reduced) in size using Clop app (via the app or directly within the Dockside) will show this lightning decorator to help you identify the file.
Auto-hide Functionality: Dockside fades away when no activity is detected, helping you stay focused on your work. It reappears as soon as it detects dragging or mouse movement, ready to assist with docking. Optionally, you can also hide the Dock completely using the Settings menu and reveal when you need to drop or take mouse closer to it. The Docks automatically hides when the app is in full screen mode or if the Dock itself is in a auto-hide mode.
Can I drag files into the folders in shelf?
Yes, you can. Just press and hold Function (Fn) key when dragging a file, simply drag it to the target folder in the Dockside shelf. You can do the same with existing files in the shelf too. 
App Launcher
Yes, an App Launcher is now integrated directly within Dockside. When you drag and drop apps into the shelf for quick access, Dockside will automatically store them in an App Drawer for easy access, keeping the Files Shelf separate and focused solely on your files. If you’d prefer to treat app drops like any other file drops and keep them in the shelf instead of the App Drawer, you can always toggle this behavior in Settings. 
Dockside Controls
Dockside includes several convenient buttons to help you manage your files efficiently:
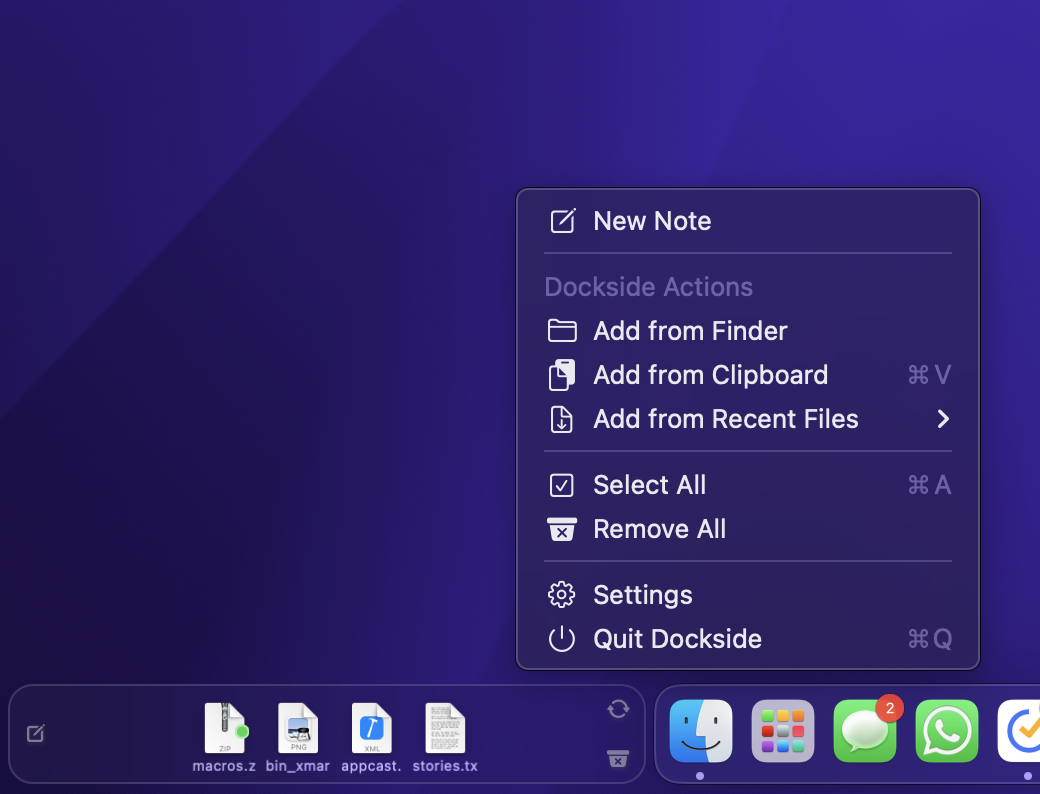
Create Note 📝: Click this button to quickly create a new note. This is useful for jotting down information or reminders directly in Dockside without needing to open another application.
Refresh Button 🔄: The refresh button serves multiple purposes:
- Remove Non-Existent Files: It clears out any files or items in Dockside that no longer exist on your system.
- Reset Dockside Size: This button automatically resizes Dockside to fit the available space on your screen, optimizing your workspace.
Remove All Items Button ❌: This button gives you control over clearing files in Dockside:
- Remove All Files: If no files are selected, clicking this button will remove all items from Dockside.
- Remove Selected Files: If you’ve selected specific files (via checkboxes), clicking the button will only remove those selected items, leaving the rest intact.
These buttons are designed to keep Dockside organized, flexible, and easy to use for all your file management needs.
Dockside Options in Settings
Dockside can be customised to fit your workflow and screen size:
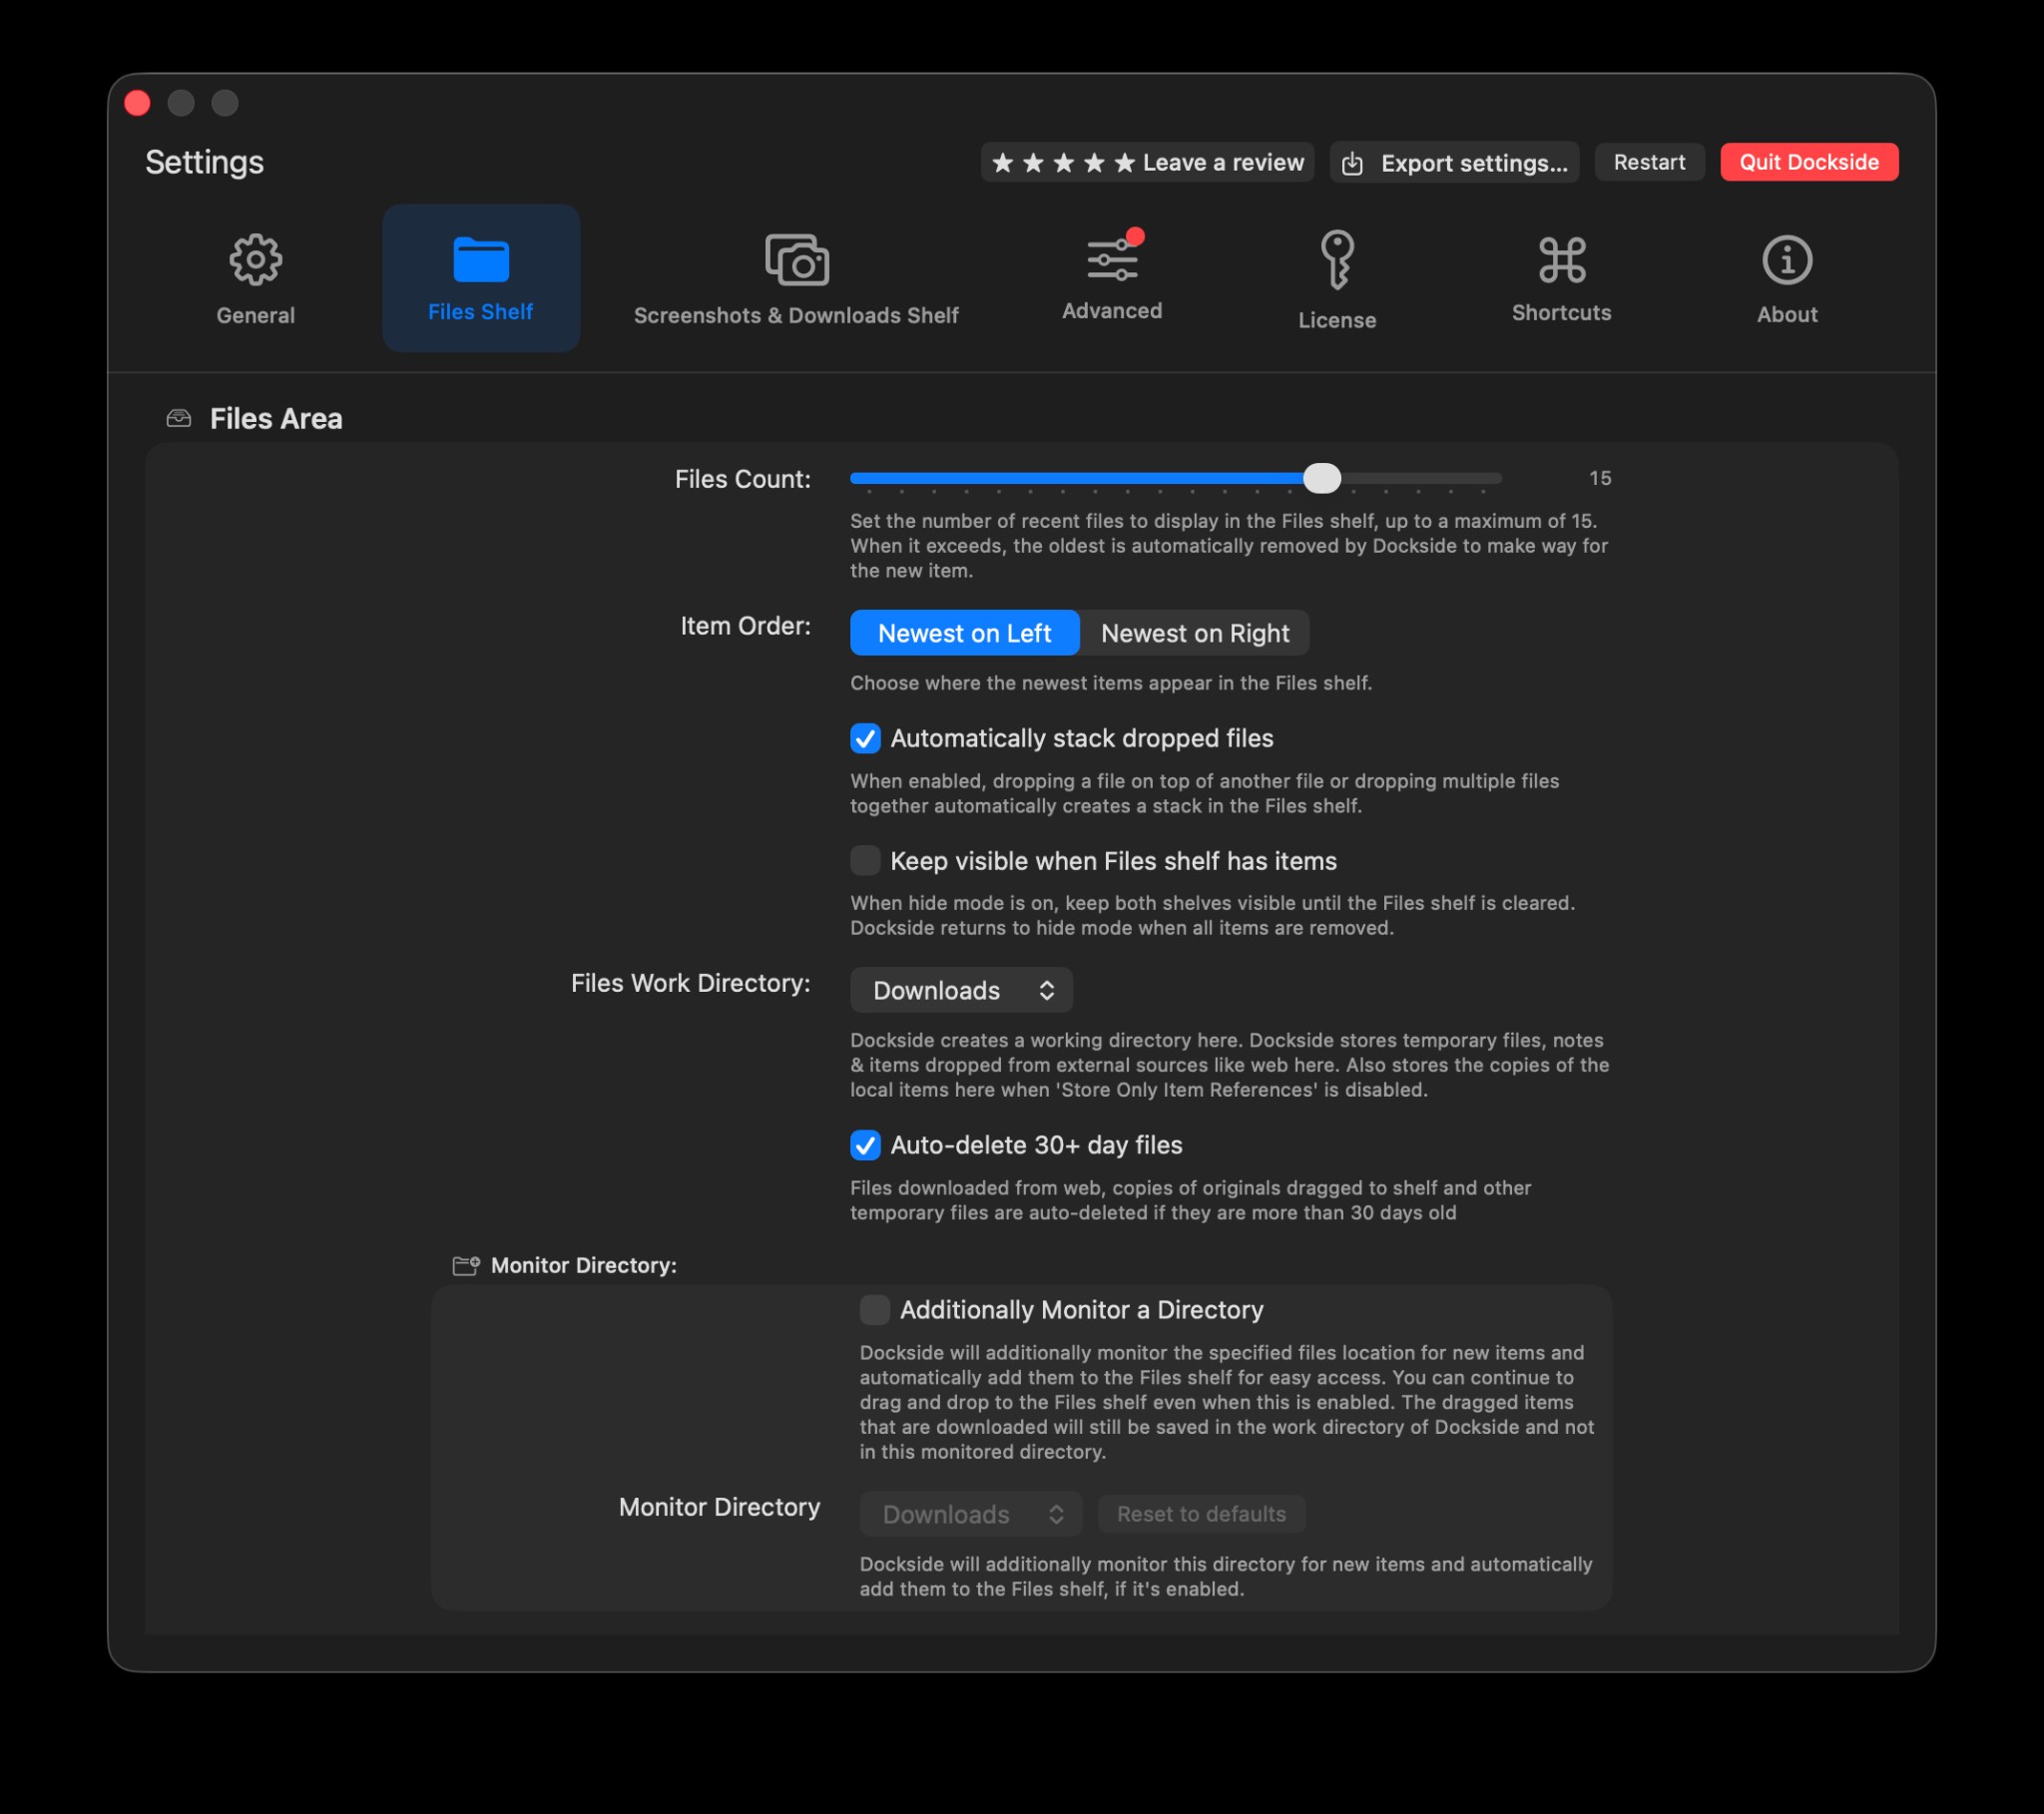
Files Location & Count 📝: Set where temporary files that are dropped from exteneral sources like web are saved (default is “Downloads”). This is also where the local item copies are saved when “Store Only Item References” is turned off. Adjust how many files (up to 15) and notes (up to 10) are shown, beyond which the Dockside will remove the oldest item to hold the new item automatically.
Screenshots 📸:
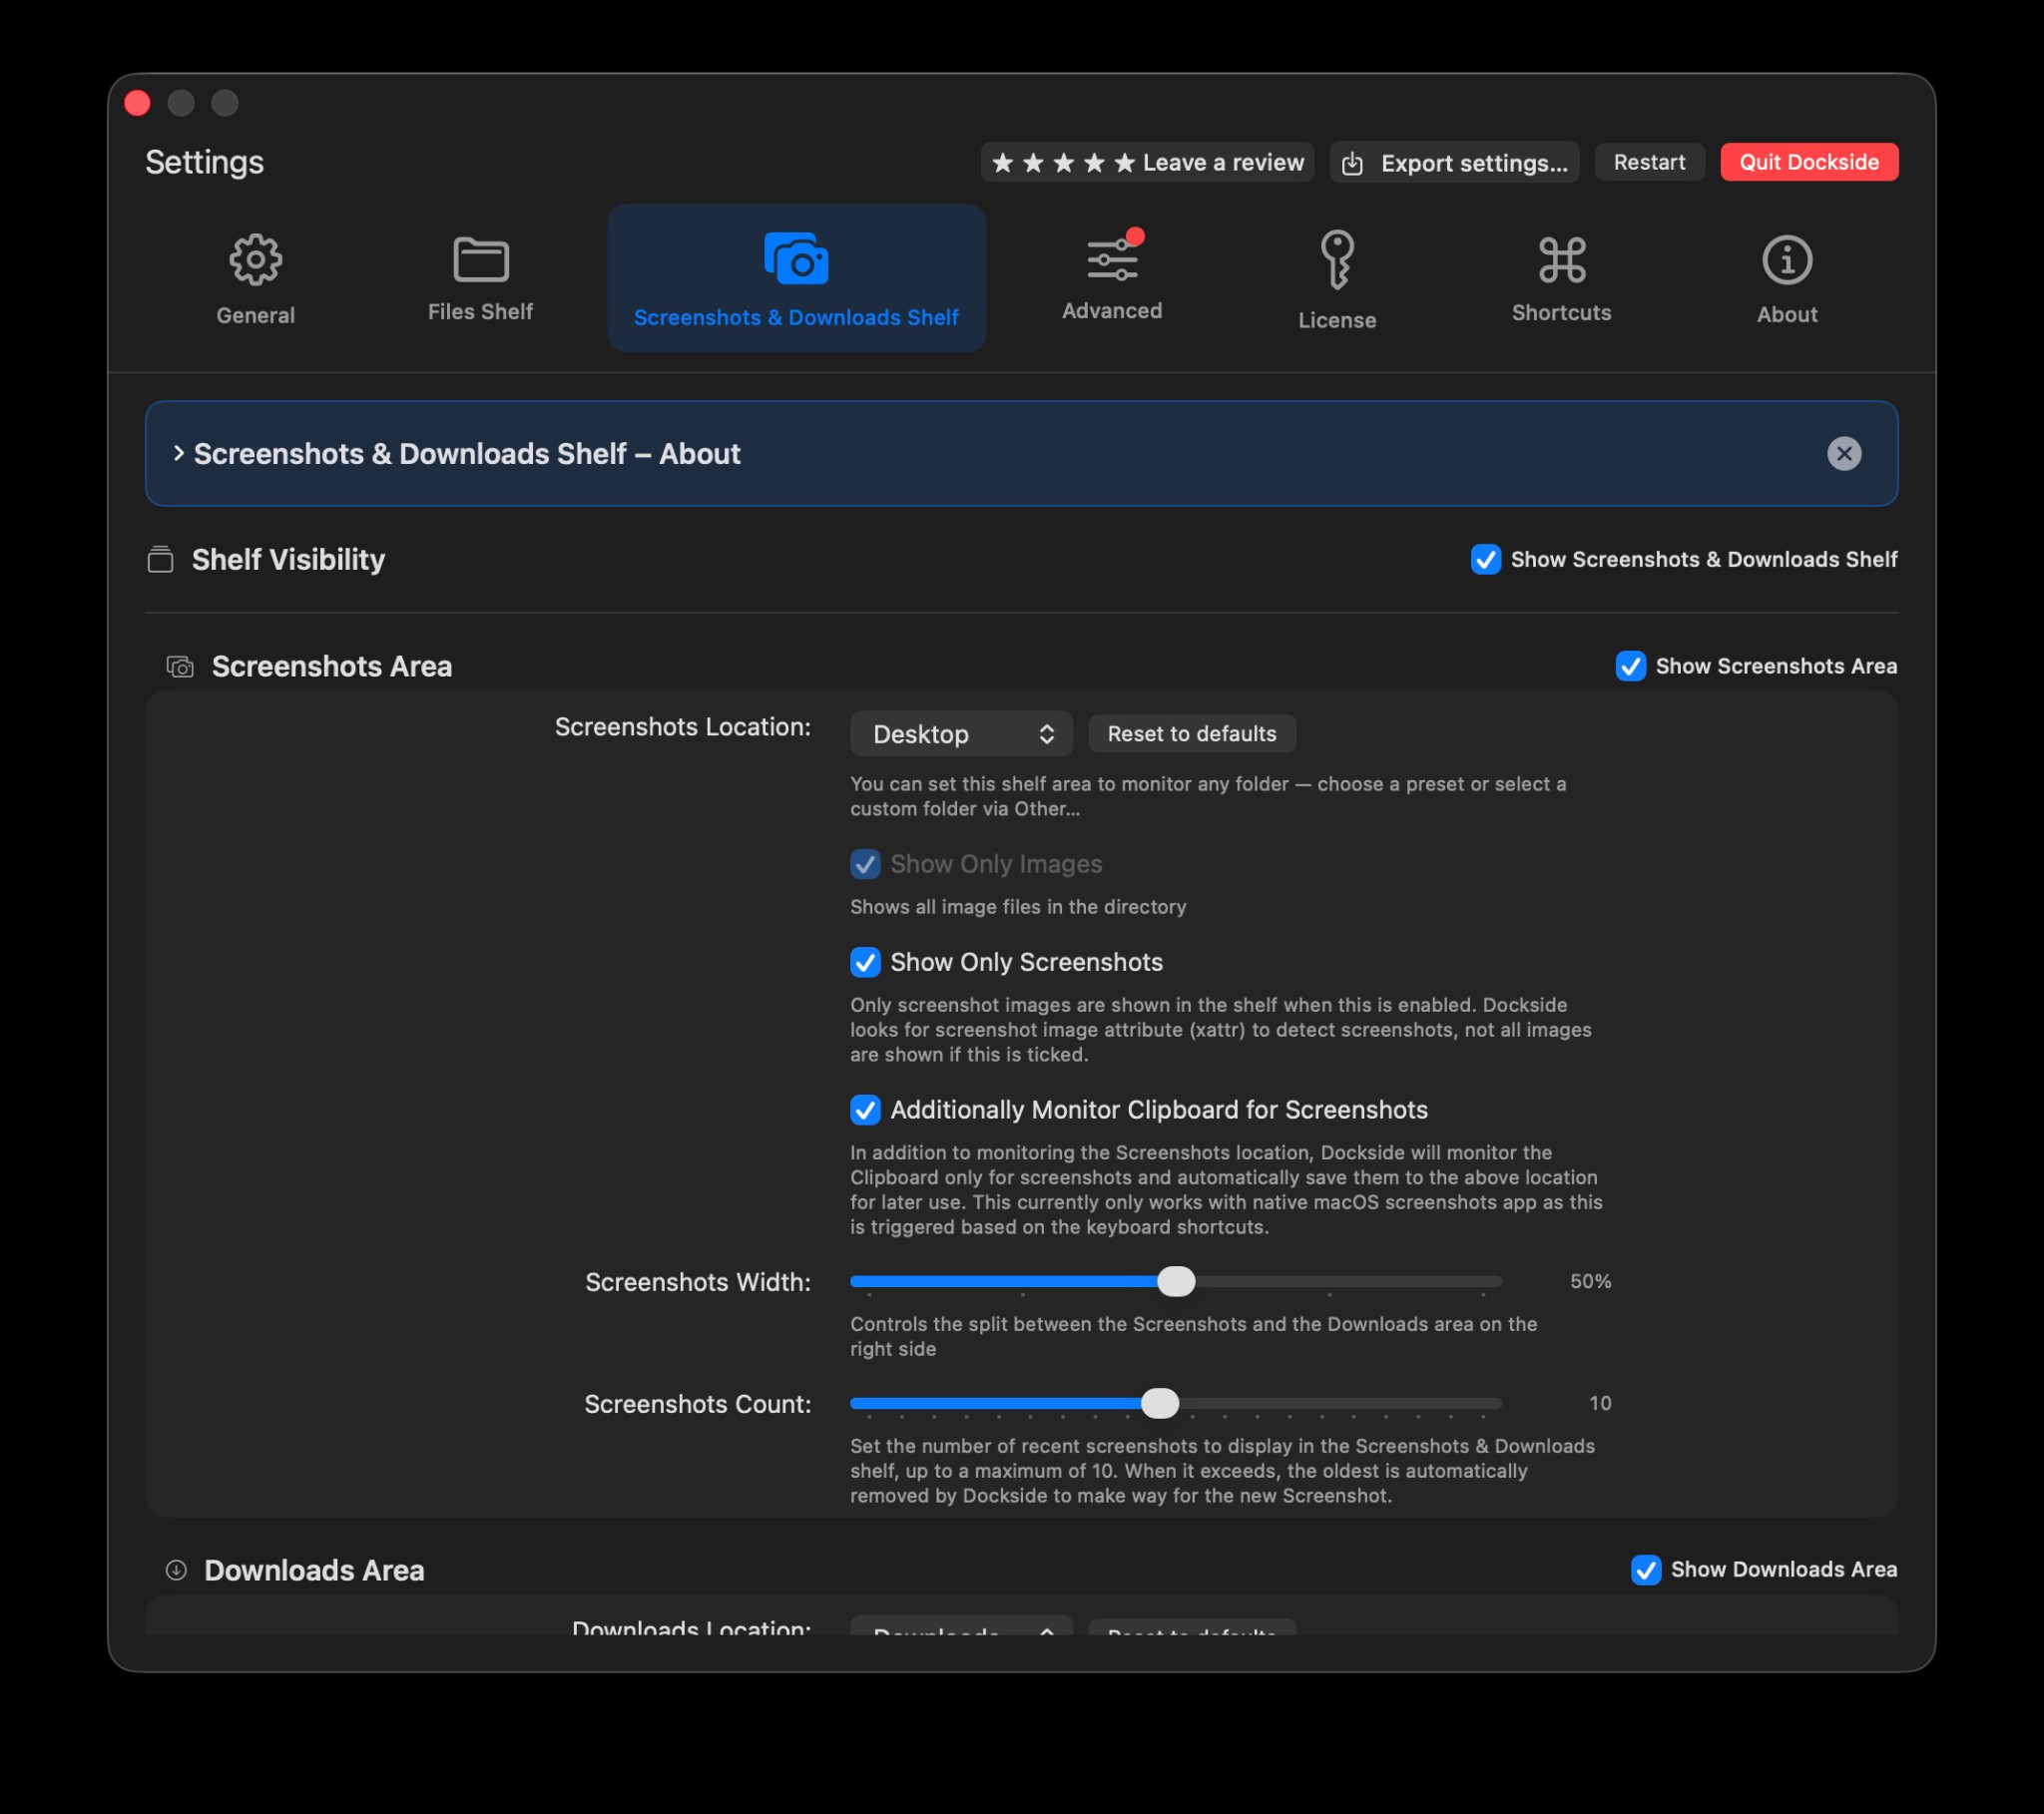
- Location: Define where screenshots are stored in your computer (default is “Desktop”). The Dockside looks for the screenshots attribute in the file to determine if the image is a screenshots, not all image files present in the directory are shown here.
- Clipboard Monitoring: Enable automatic download of Clipboard screenshots for later use in Screenshots area (if the destination is set to Clipboard for the macOS screenshots)
- Screenshots Width & Count: Adjust the display width and number of screenshots (up to 10). This will be automatically adjusted from the Downloads area.
Downloads ⬇️: Control how many recent downloads are shown (up to 10).
Files Shelf settings
Screenshots & Downloads Shelf settings
Mouse Actions
Dockside offers a range of mouse actions to help you interact with files and the Dockside interface more efficiently. You can perform actions directly on files or on the Dockside itself (including the empty space).
Mouse Actions on Files:
Hover: Move your mouse over a file to see a preview. For known file types, Dockside uses Quick Look previews, but for text files, it offers a custom preview that allows you to scroll through the document without even moving the mouse away from the icon. Simply use your scroll wheel when the preview appears (just hold the mouse still) to navigate through the content! You can also easily remove an item [x] or select an item [✓] using the action buttons.

Double-click: Open the file by double-clicking it. This action launches the file in its associated application.
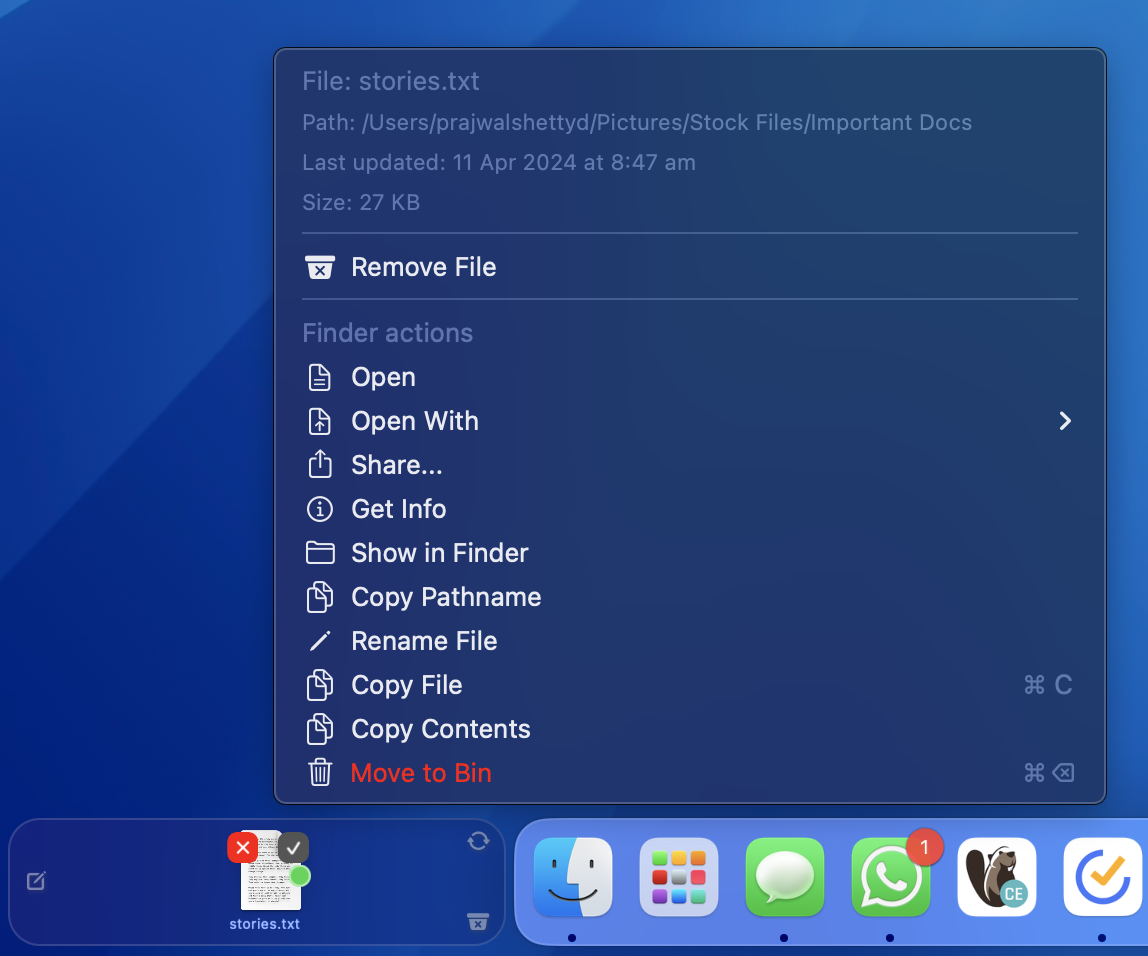
Right-click: Right-click on a file to bring up the context menu with useful and commonly required actions including showing basic info about the item on the top and provides additional options such as opening with another app, renaming, sharing, copy item, copy contents or deleting the file.
Single-click: Click once on the file’s checkbox to select it. You can select multiple files this way.
Drag to select: Click and hold your mouse to drag and create a selection rectangle. This action allows you to select multiple files at once by encompassing them within the rectangle.
Mouse Actions on Dockside (Empty Space):
- Double-click on empty space: Double-clicking anywhere on the empty space in Dockside will force a refresh of the Dockside size, ensuring it automatically adjusts to fit the available space on your screen.
- Right-click on empty space: Right-clicking on the Dockside (without selecting any files) will bring up the Dockside options menu. This menu includes options like:
- Select All: Selects all files currently visible in Dockside.
- Remove All Files: Removes all files from Dockside.
- Settings: Opens Dockside’s settings for further customisation.
These actions give you quick and efficient ways to interact with both files and Dockside itself in addition to the drag and drop functionality, making the item management easier and more intuitive.
Multiple File Selection
Selecting multiple files in Dockside is simple and flexible. Here are three methods:
- Draw a Selection Box: Click and drag your mouse to create a rectangle around the files you want to select.
- Checkbox Selection: Hover over an icon to reveal a checkbox and select specific files.
- Keyboard Shortcut: Use
⌘ + Ato select all files currently visible in Dockside.
Keyboard Shortcuts for Efficiency
The mouse actions may not be enough for many like me, Dockside supports few handy keyboard shortcuts to streamline file management, just like Finder:
- Copy/Paste: Use
⌘ + Cand⌘ + Vto copy and paste files. - Select All: Use
⌘ + Ato select all files in Dockside. - Move to Bin: Use the
⌘ + ⌫to quickly delete files. - Restore Previously Removed Items: Use
⌘ + Zto put back the recently removed files from the Files shelf. - Full sized Quick Look previews: Click the icon in the shelf and press space bar to show a full sized Quick Look preview of the item.
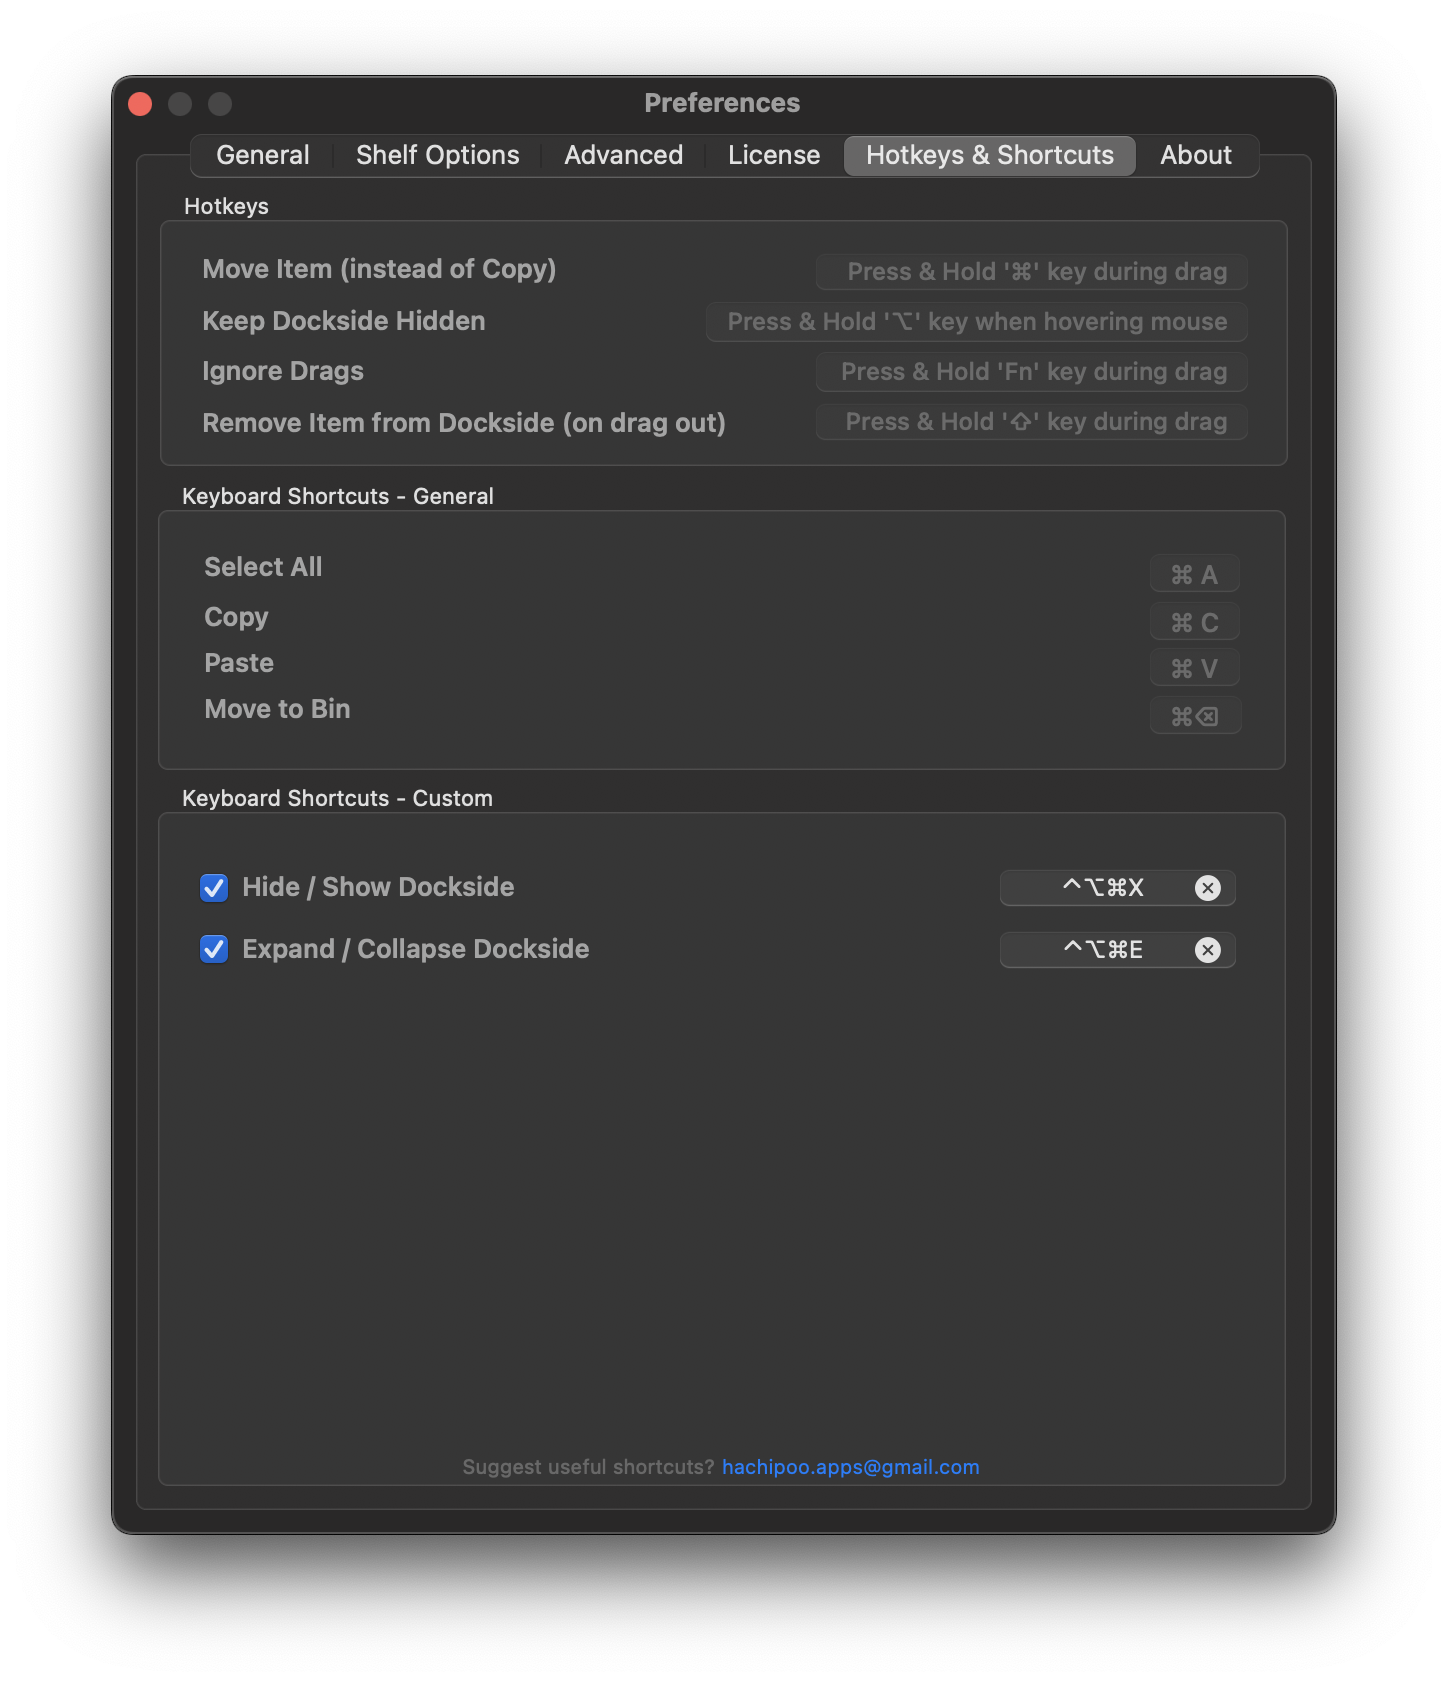
Custom keyboard shortcuts:
- Show/Hide Dockside (toggles auto-hide mode): Use
^ ⌘ ⌥ + X - Expand/Collapse Dockside: Use
^ ⌘ ⌥ + E
HotKeys:
- To reveal Dockside temporarily (when in auto-hide mode): Press and hold the
Control(^) + Option (⌥) + Command(⌘)key to temporarily reveal the Dockside shelves from hiding. - Remove When Dragging Out: Hold the
Option(⌥)key while dragging an item out of Dockside to remove it from the Dockside shelf after the operation. This works even when the “Store only item references” option is enabled. - Move File (Instead of Copy): If you want to move the file to the target instead of copying it, hold the
Command(⌘)key during the drag operation (just like in Finder). - Ignore Dockside Activation During Drag: To temporarily prevent Dockside from activating during a drag, press and hold the
Function(Fn)key while dragging. - Keep Dockside Hidden (In auto-hide Mode): To ignore mouse hover near Dockside when it’s in auto-hide mode, press and hold the
Option (⌥)key.
Dockside is designed to feel as intuitive as Finder, making file management smooth and familiar.
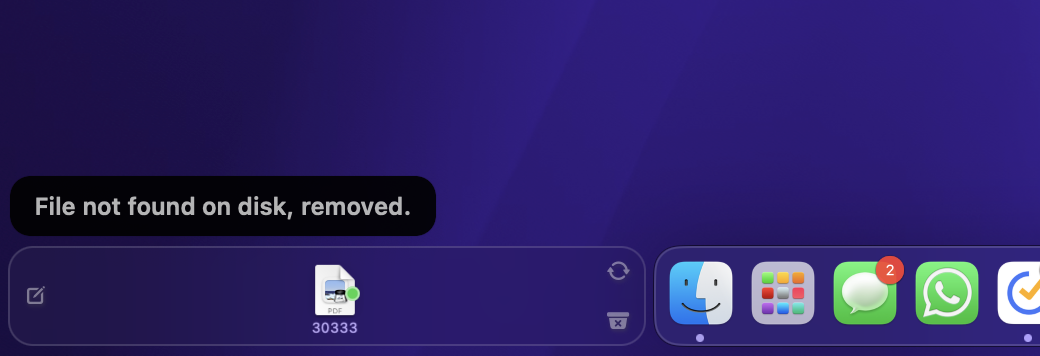
Handling Non-Existent Files
Sometimes a file listed in Dockside is deleted from the disk. When this happens:
- Auto Cleanup: Hover over the file, and Dockside will automatically delete it from the list when they have been deleted from the source.
- Manual Cleanup: Use the refresh icon to remove any non-existent files or empty quick notes from Dockside.
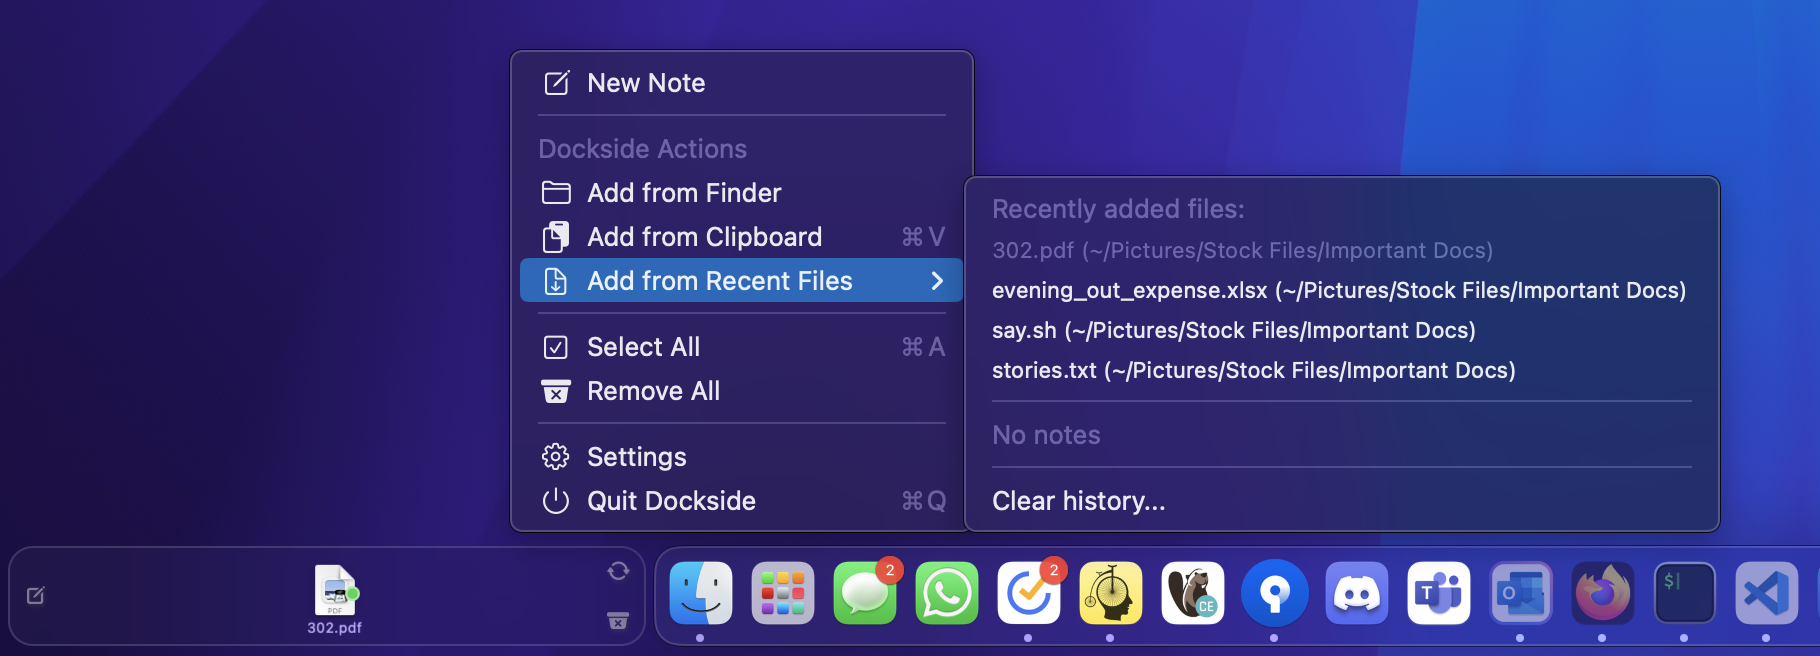
Recently Added Files
Dockside keeps track of recently added files and recently created notes, making it easy for you to quickly add them back if needed.
- Recent Files: Files that are already in Dockside will appear greyed out in the recently added list.
- Recent Quick Notes: Dockside also tracks your recently created quick notes for easy reference.
You can also go to the directory where these files are stored and managed by Dockside using the menu option.
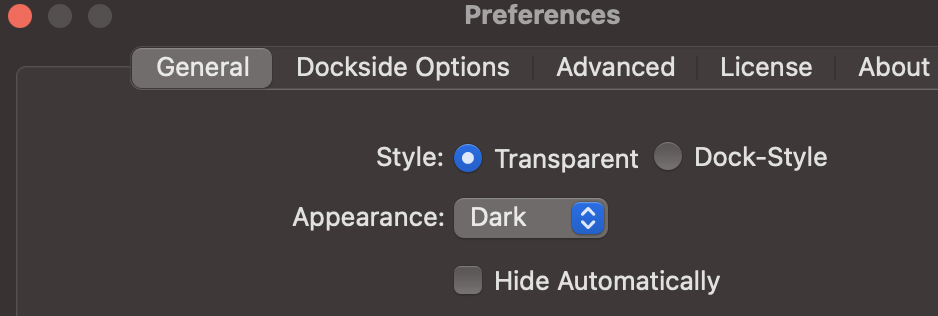
Customise
Dockside offers several customisation options to fit your workflow:
- Styles & Appearance: Change the appearance of the file shelf to suit your aesthetic preferences.
- Resize and Auto-hide: You can activate sensitive mode to react dynamically to the Dock changes to allow Dockside to adjust to the available space. Optionally, you can enable auto-hide option to hide away the Dockside.
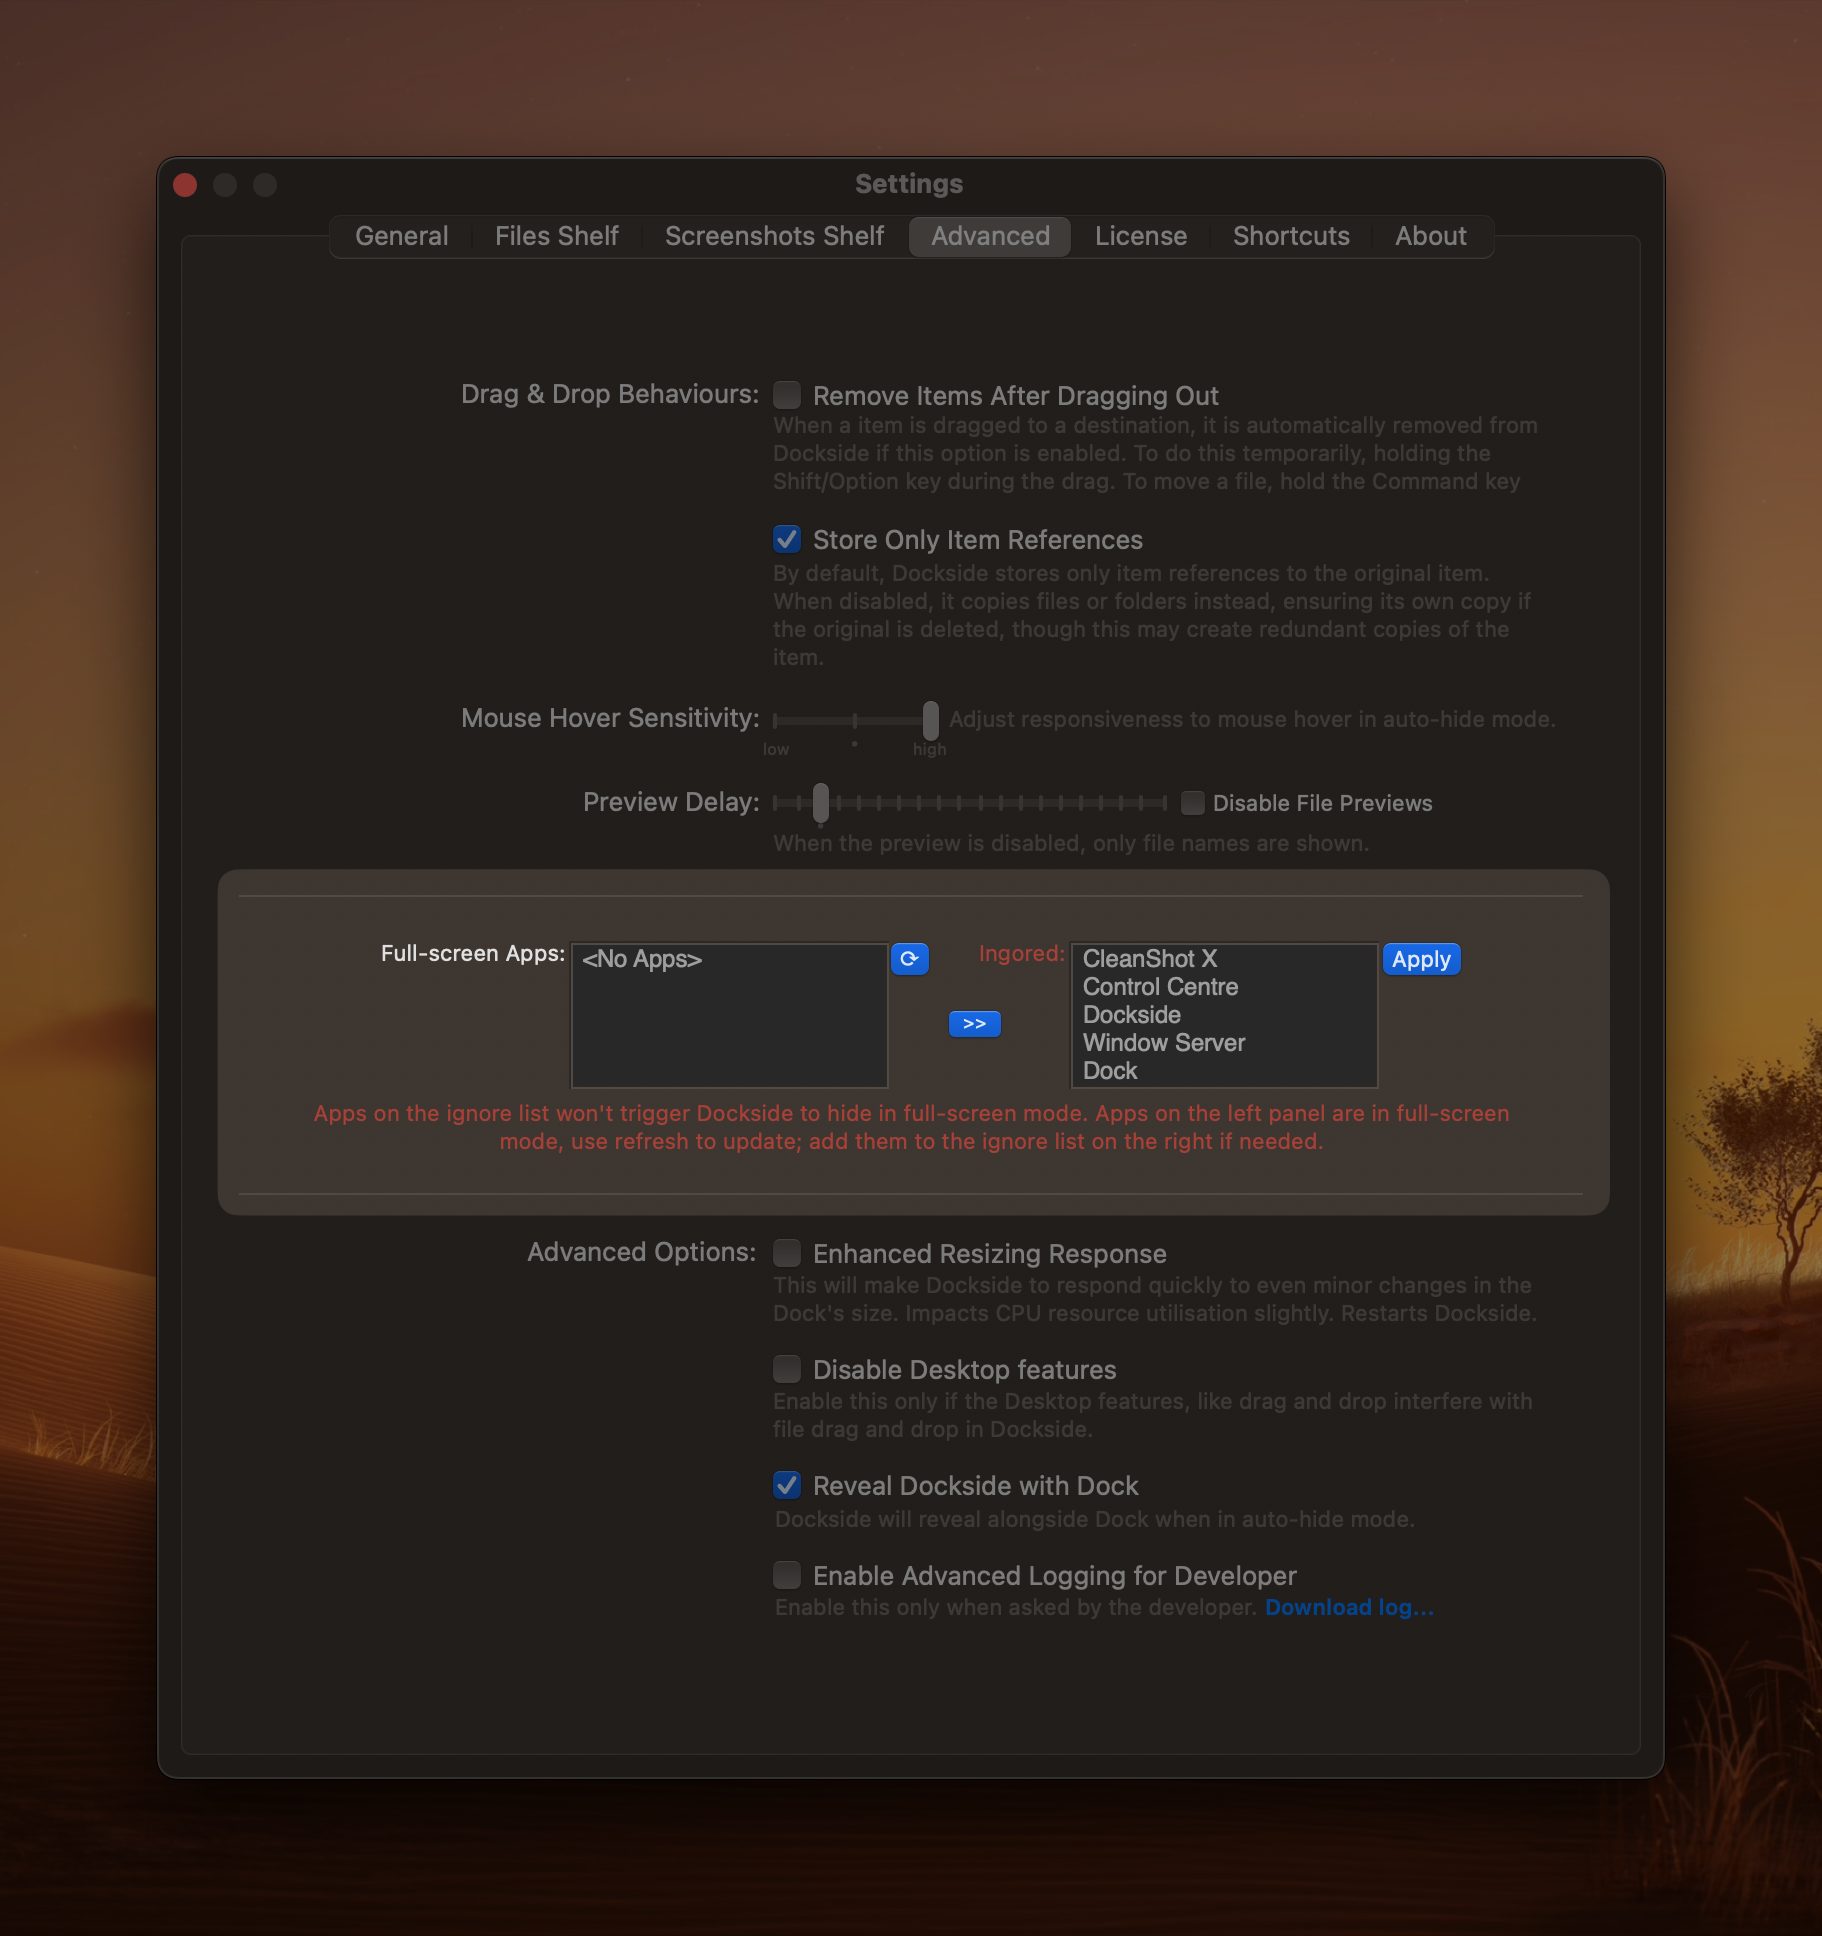
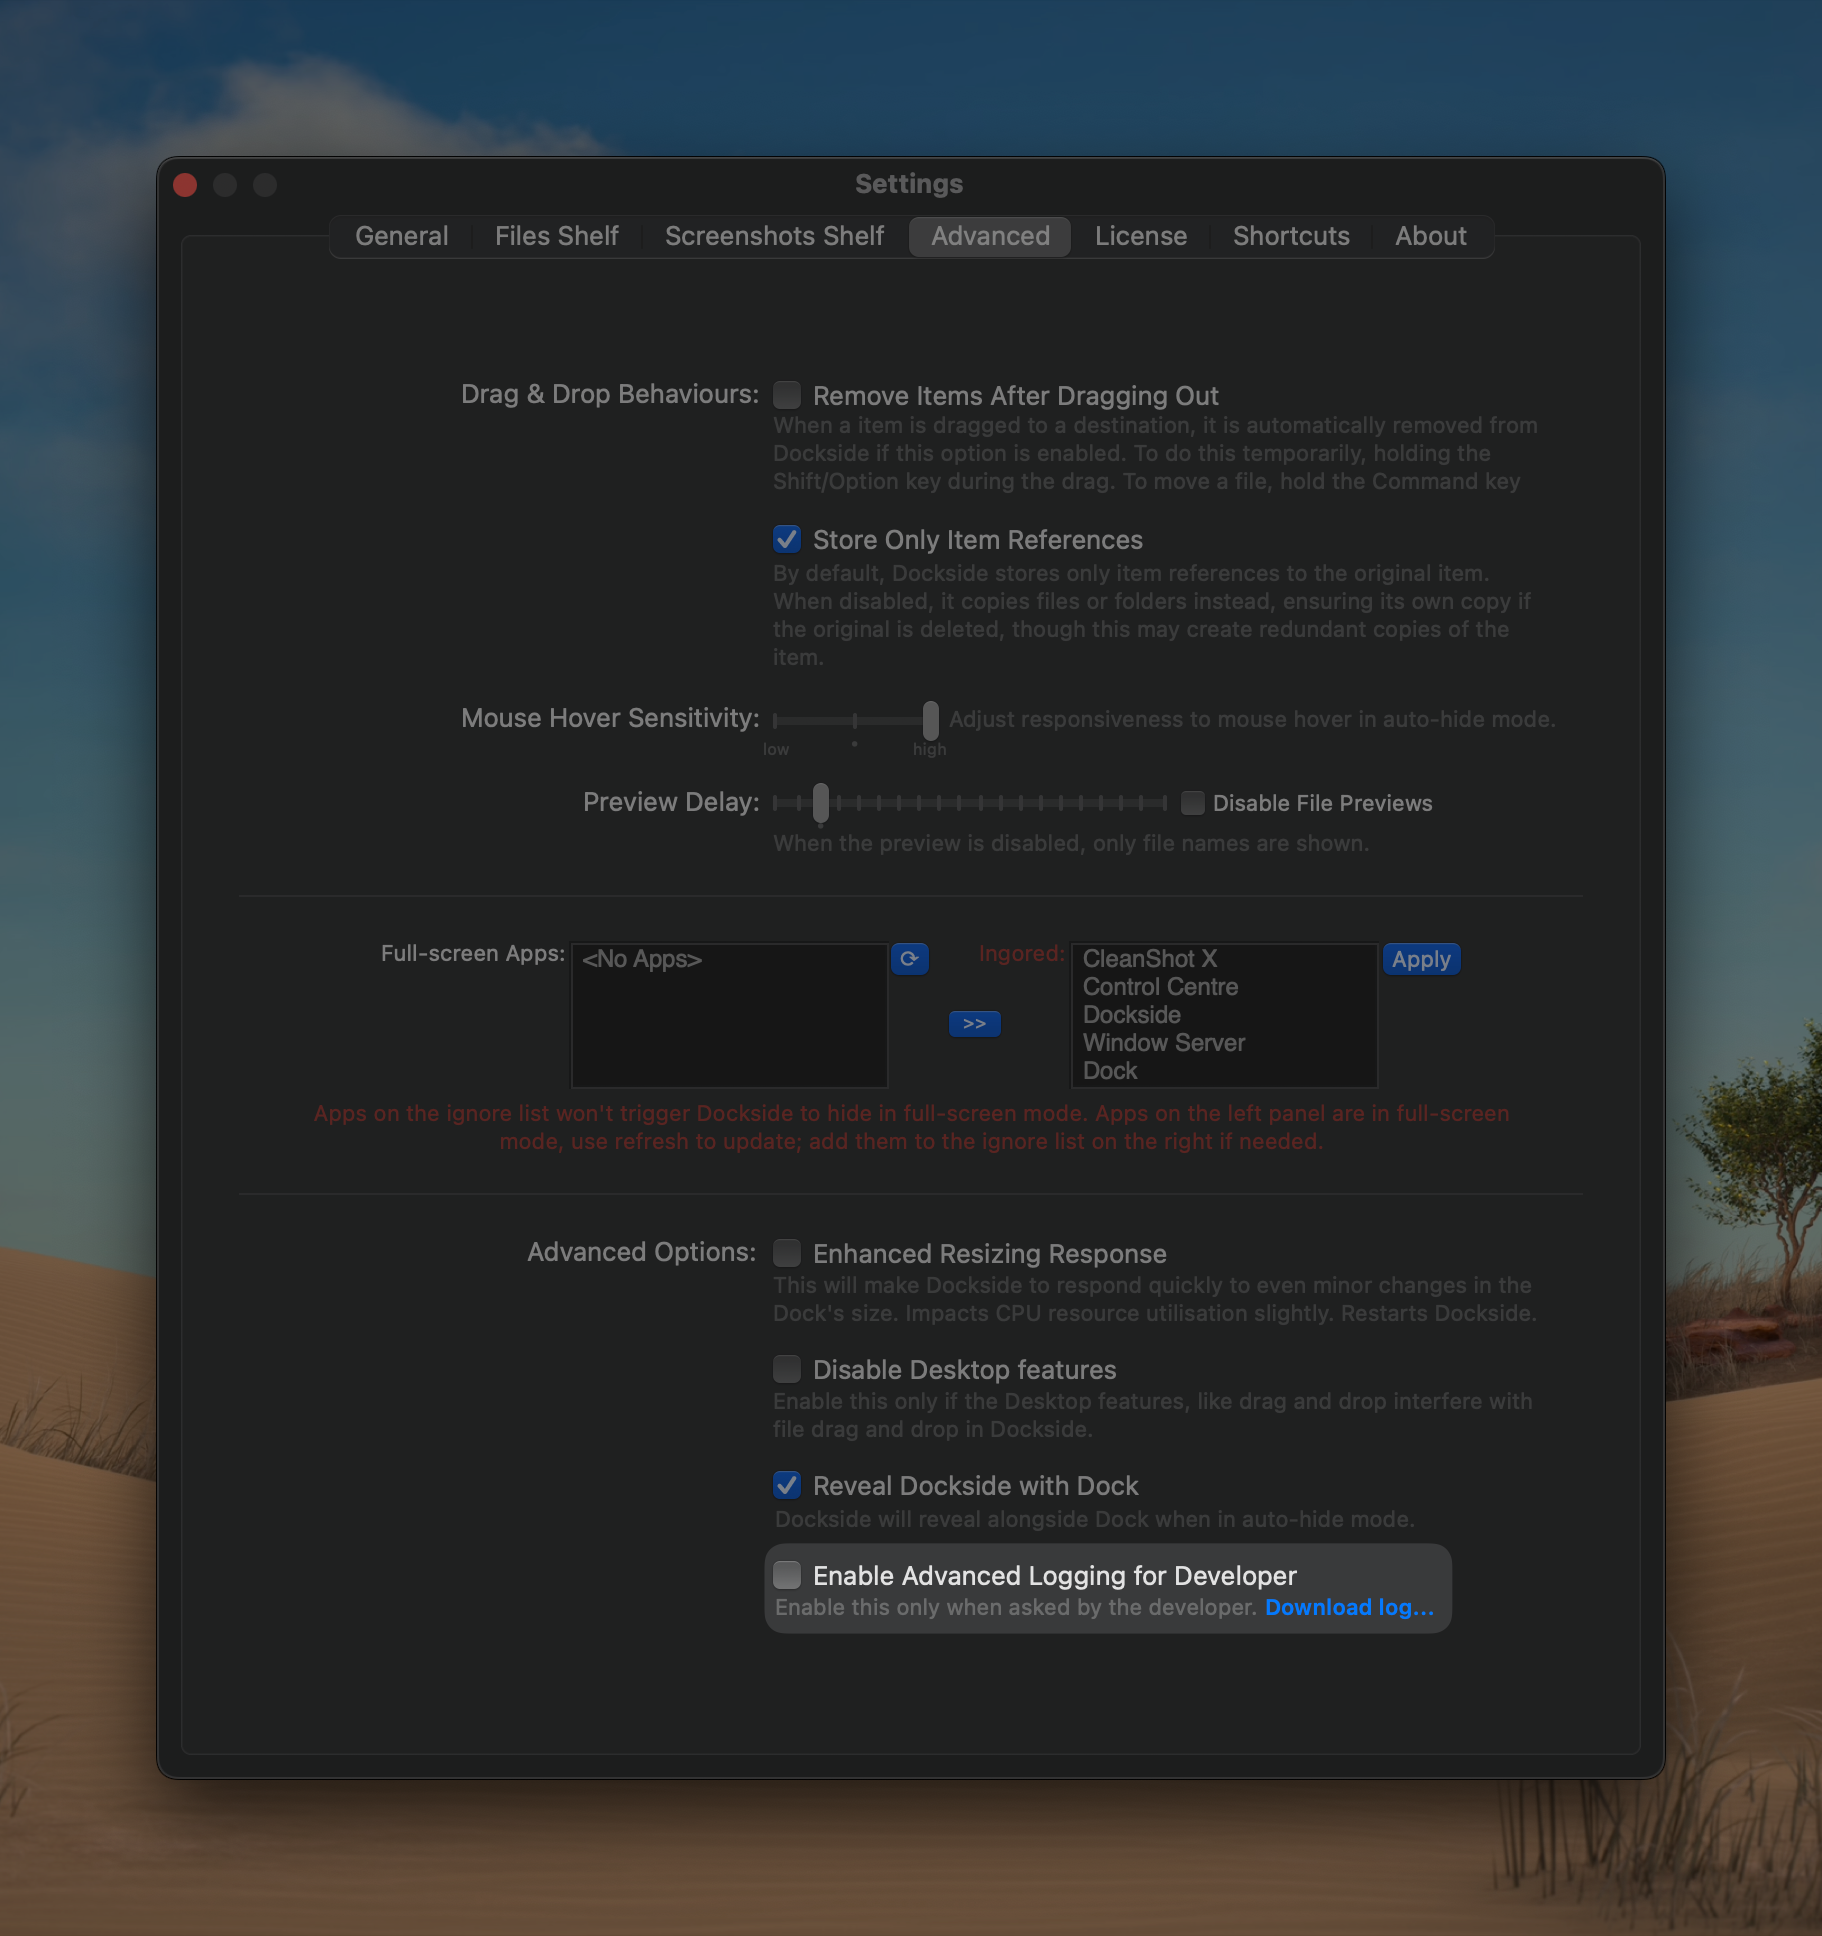
Advanced Options
Dockside offers several advanced settings to fine-tune how it behaves on your Mac:
Disable Desktop Features: If macOS desktop features (like dragging icons) interfere with Dockside, you can disable these interactions from the advanced settings menu.
Control Drag-and-Drop Behavior:
- Disable “Store only item references” if you prefer to store a copy of the item in Dockside. The location where this item is saved is also something you can specify using Files location, if you want this to be in the iCloud/OneDrive/DropBox - configure this in the settings.
- Enable or disable the “Remove items after dragging out” option based on your workflow.
Enhanced Sizing Response: Dockside will react to small changes in Dock size changes, make it more fluid in nature. This might be annoying at times, so by default it is turned off. To manually resize the Dockside for any changes in the Dock, just click or double-click the empty space of the Dockside.
Ignore apps: Dockside will automatically detect full screen apps and auto-hide when you are on it to keep your work distraction free. If there’s an app that is registered in macOS as a full-screen app and is interfering with your workflow, identify such apps by looking through the running apps list with a [X] suffix (indicates that app is registered to be running in full screen mode) and add them to the ignore list, click ‘Apply’ and restart Dockside app.
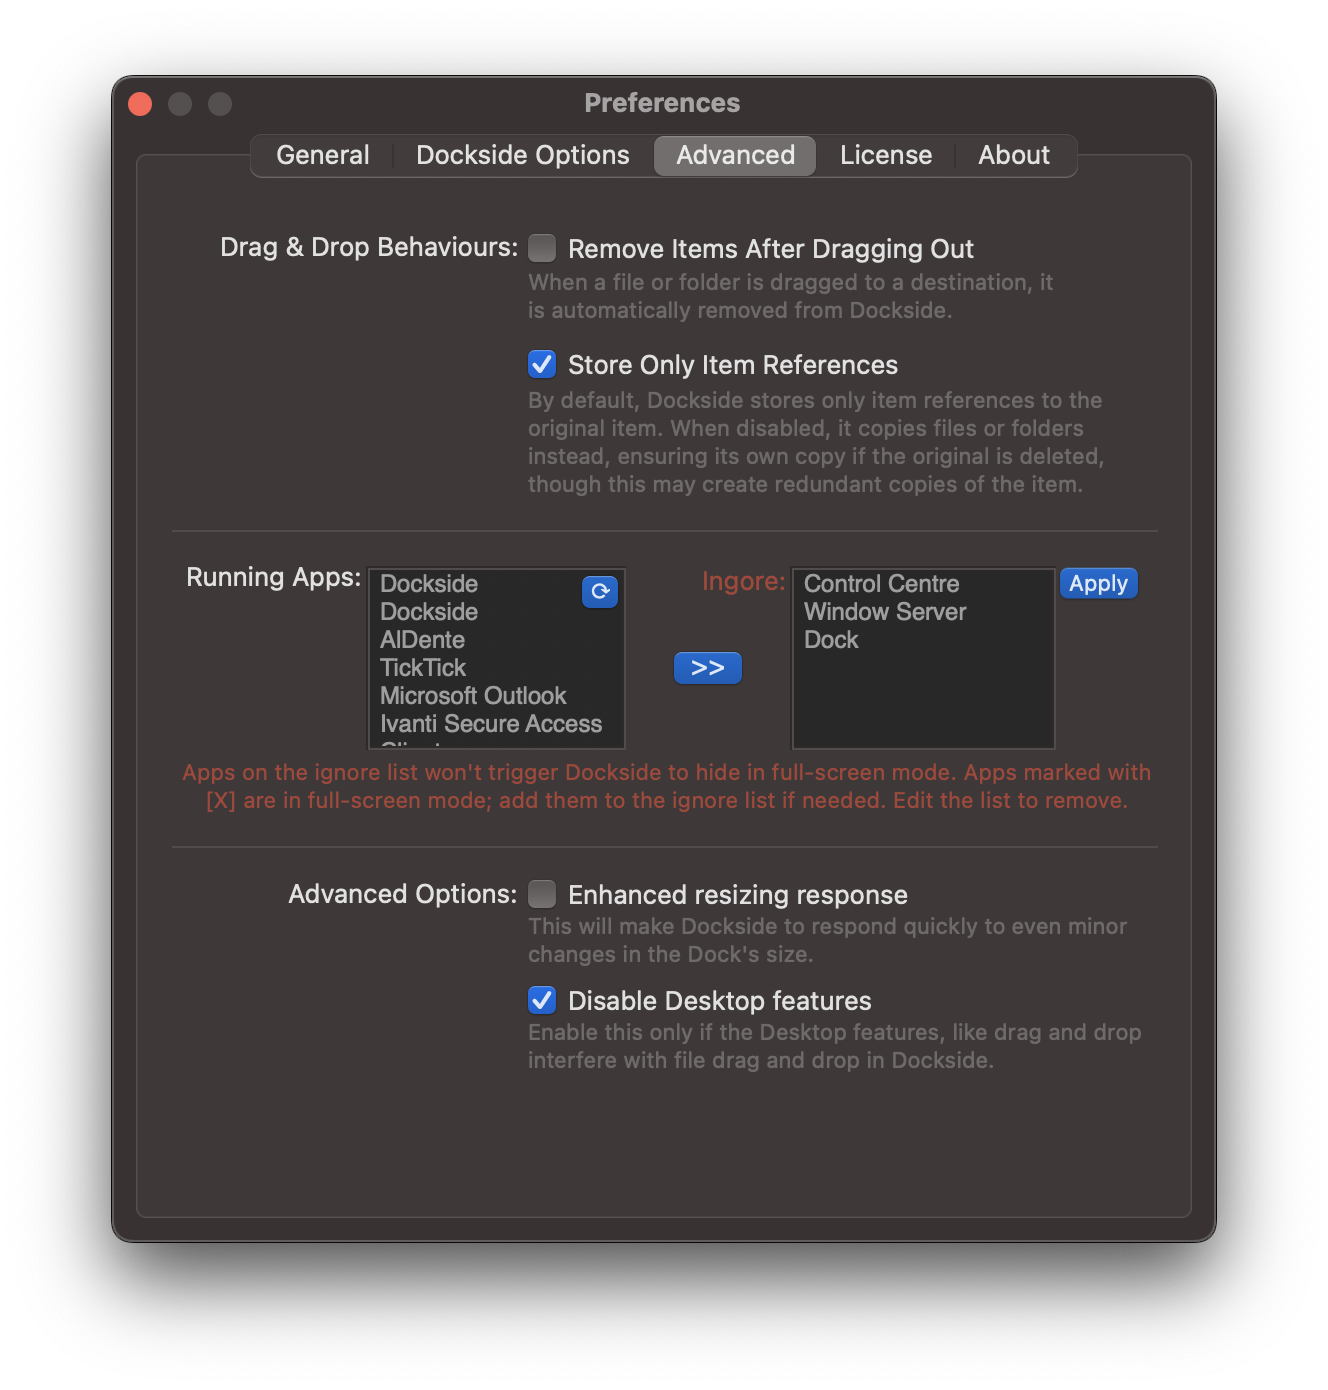
These advanced settings give you full control over how Dockside integrates into your desktop experience.
Scripting/Automation and Third-party Apps
License Limitations
Dockside allows activation on up to three devices at a time. If you need to use Dockside on another machine:
- Deactivation: Simply deactivate Dockside on one machine before activating it on another.
Data Privacy
Your privacy is our priority. Dockside is designed to operate locally on your machine, and we do not collect any data or usage statistics. Here’s what you need to know:
- No Data Collection: Dockside does not track or send any of your data to external servers. All your files, folders, and notes remain entirely on your device.
- License Activation: The only time Dockside connects to the internet is during license activation. After activation, the app functions completely offline.
You can trust that Dockside is built with privacy at its core. As an indie developer, I built Dockside with a focus on privacy and utility. I have no need for your data and no interest in collecting it—my goal is to provide a simple, efficient tool for managing your files while keeping your privacy intact.
We hope these tips help you get the most out of Dockside. For any further questions or assistance, feel free to reach out at hachipoo.apps@gmail.com or through our Discord Server.